Mercedes-Benz vehicles are renowned for their complex engineering and sophisticated technology. To properly diagnose and maintain these vehicles, professionals and enthusiasts alike rely on powerful diagnostic tools. Among these, Mercedes Xentry software stands out as the official and most comprehensive solution. This Xentry Tutorial will guide you through understanding, installing, and effectively using this essential software to unlock the full diagnostic potential of Mercedes-Benz vehicles.
Mercedes Xentry software is not just another OBD-II scanner; it’s a dealer-level diagnostic system used by Mercedes-Benz technicians worldwide. It offers in-depth access to vehicle systems, allowing for precise fault diagnosis, advanced programming, and comprehensive vehicle maintenance. Whether you’re a seasoned mechanic or a dedicated DIYer, mastering Xentry is crucial for anyone working on modern Mercedes-Benz automobiles.
What is Mercedes Xentry Software and Why is it Essential?
Mercedes Xentry is the cornerstone of Mercedes-Benz diagnostics. It’s a multifaceted tool that goes far beyond basic error code reading. Here’s a breakdown of its key capabilities and benefits:
- Comprehensive Diagnostics: Xentry provides access to fault codes, live data streams, sensor readings, and system statuses across all vehicle modules. This detailed information allows for pinpointing the root cause of issues quickly and accurately.
- Guided Troubleshooting: Struggling to interpret complex data? Xentry’s guided troubleshooting feature offers step-by-step instructions, diagrams, and repair information to navigate even the most intricate diagnostic procedures.
- Advanced Programming and Coding: From replacing control units to customizing vehicle features, Xentry enables module programming and coding. This functionality is vital for repairs, software updates, and personalization options.
- Access to Official Mercedes-Benz Data: Staying up-to-date is critical in automotive repair. Xentry provides direct access to the latest technical service bulletins (TSBs), repair manuals, and vehicle information directly from Mercedes-Benz, ensuring you’re always working with the most current data.
- Enhanced Efficiency and Customer Satisfaction: By streamlining the diagnostic and repair process, Xentry software saves time and reduces costs. This translates to faster turnaround times, more efficient workshops, and ultimately, increased customer satisfaction.
In essence, Mercedes Xentry empowers you to perform dealership-level diagnostics and repairs, ensuring the optimal performance and longevity of Mercedes-Benz vehicles.
Getting Started with Xentry: Installation and Setup Tutorial
Before diving into diagnostics, you need to properly install and set up your Mercedes Xentry software. This Xentry tutorial section will walk you through the process:
System Requirements:
Before you begin, ensure your computer meets the minimum system requirements to run Xentry smoothly:
- Operating System: Windows 7, 8, 8.1, or 10 (64-bit recommended for optimal performance)
- Processor: Intel Pentium 4 or higher (Intel Core i5 or higher recommended)
- RAM: 4 GB of RAM (8 GB or more recommended for faster processing)
- Hard Drive Space: 10 GB of free hard drive space (SSD recommended for faster loading times)
- Connectivity: Stable internet connection (required for updates and online resources)
- Diagnostic Interface: Compatible Mercedes-Benz diagnostic scanner (e.g., C4, C5, eCOM)
Installation Steps:
- Obtain the Xentry Installation Package: Typically, the software is obtained through authorized Mercedes-Benz channels or reputable aftermarket suppliers. Ensure you are using a legitimate source to avoid issues and security risks.
- Run the Installation Package: Locate the downloaded installation file and run it. Follow the on-screen prompts, which will guide you through the installation process. This may involve accepting license agreements and choosing installation directories.
- Software Launch and Login: Once installed, locate the Xentry software icon and launch it. You will be prompted to enter your user credentials. These are usually provided with your software license.
- Initial Software Update: Upon successful login, Xentry will automatically check for available updates. It’s crucial to install these updates to ensure you have the latest features, vehicle data, and bug fixes. Allow the software to download and install all necessary updates.
- Interface Familiarization: After updates are complete, the main Xentry interface will load. Take some time to familiarize yourself with the layout, menus, and tabs. The next section of this Xentry tutorial will delve deeper into the interface.
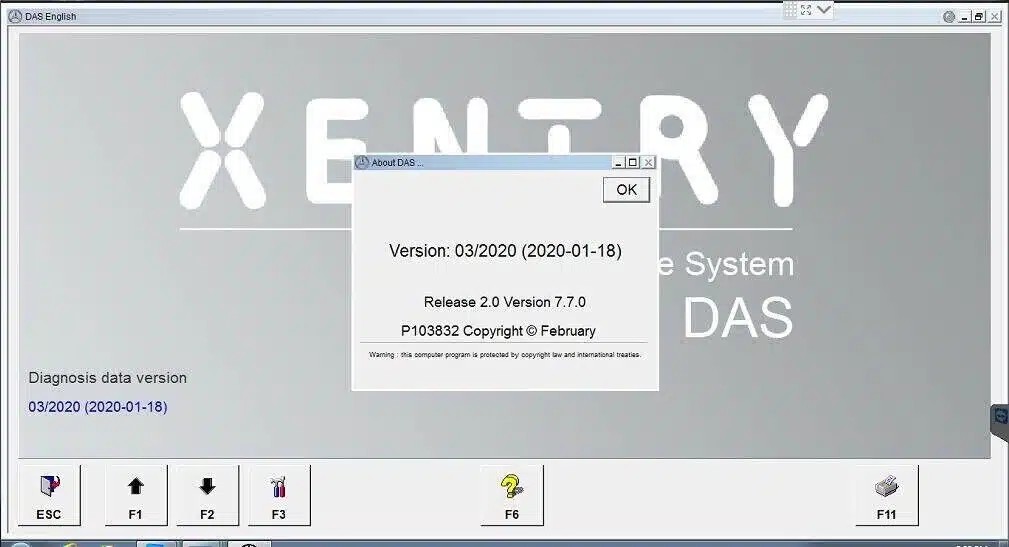 Image alt: Mercedes Xentry Software Main Interface showcasing the tab layout and toolbar.
Important Notes:
- Internet Connection: Maintain a stable internet connection during installation and for ongoing use, as Xentry relies on online resources and updates.
- Diagnostic Hardware: Remember that Xentry software requires a compatible diagnostic scanner to interface with the vehicle. Ensure you have the correct hardware connected before attempting diagnostics.
- Security: Always download Xentry from trusted sources to prevent malware or corrupted software.
Navigating the Xentry Interface: A Comprehensive Tutorial
The Mercedes Xentry interface is designed to be user-friendly, organizing its powerful features into logical tabs and menus. This part of our Xentry tutorial will guide you through the main sections:
The Xentry main interface is structured with a tab system, each dedicated to a core function:
-
Diagnostics Tab: This is your primary workspace for troubleshooting. Selecting this tab grants access to:
- Fault Code Reading and Clearing: Retrieve Diagnostic Trouble Codes (DTCs) from all vehicle systems and clear them after repairs.
- Live Data: Monitor real-time parameters from sensors and modules, crucial for identifying intermittent faults and verifying system operation.
- Actuations/Component Testing: Activate components (e.g., relays, solenoids, motors) to test their functionality independently.
- Guided Diagnostics: Initiate step-by-step troubleshooting procedures provided by Mercedes-Benz for specific fault codes or symptoms.
-
Programming Tab: For advanced users, the Programming tab enables:
- Control Unit Programming: Replace or update electronic control units (ECUs) with the latest software versions.
- Coding and Variant Coding: Customize vehicle settings, enable/disable features, and adapt new components to the vehicle’s configuration.
- Key Programming: Program new keys or immobilizer functions (requires specific security access and procedures).
-
Information Tab: Your resource hub, the Information tab provides access to:
- Vehicle Information: Retrieve detailed vehicle specifications, build data, and equipment codes.
- Technical Service Bulletins (TSBs): Access official Mercedes-Benz TSBs for known issues and repair procedures.
- Wiring Diagrams: View detailed electrical schematics for tracing circuits and diagnosing electrical faults.
- Repair Manuals: Access comprehensive repair information and procedures for various vehicle systems.
-
Vehicle Selection Tab: Before any diagnostic or programming action, you must accurately identify the vehicle you are working on. The Vehicle Selection tab allows you to:
- Manual Vehicle Selection: Enter the Vehicle Identification Number (VIN) manually to identify the specific vehicle model and year.
- Automatic Vehicle Identification: Utilize the diagnostic scanner to automatically read the VIN from the vehicle.
-
Reports Tab: Documentation is crucial in automotive repair. The Reports tab enables you to:
- Generate Diagnostic Reports: Create printable or savable reports summarizing fault codes, live data readings, and diagnostic sessions.
- Print Diagnostic Information: Directly print specific screens or data from the software for record-keeping.
-
Help Tab: For assistance and guidance, the Help tab provides:
- Software Manual: Access the built-in digital manual with detailed explanations of software functions and features.
- Troubleshooting Guides: Find solutions to common software-related issues and error messages.
Toolbar: Located at the top of the interface, the toolbar provides quick access to frequently used functions like saving data, printing, and software settings.
By understanding the layout and functions of each tab, you can efficiently navigate Xentry and leverage its powerful capabilities for Mercedes-Benz diagnostics and repair.
Practical Xentry Tutorials: Essential Diagnostic Tasks
Now, let’s put theory into practice with some essential Xentry tutorial examples of common diagnostic tasks:
1. Reading and Clearing Fault Codes (Diagnostics Tab):
- Connect Diagnostic Scanner: Ensure your compatible scanner is properly connected to the vehicle’s OBD-II port and your computer.
- Vehicle Selection: In the “Vehicle Selection” tab, identify the vehicle (manual VIN entry or automatic identification).
- Navigate to Diagnostics: Select the “Diagnostics” tab.
- Quick Test/Fault Code Scan: Initiate a “Quick Test” or “Fault Code Scan” to scan all vehicle modules for DTCs.
- View Fault Codes: Xentry will display a list of modules with fault codes. Click on a module to see specific DTCs, their descriptions, and possible causes.
- Clear Fault Codes (After Repair): After addressing the underlying issue, select the fault codes and use the “Clear Fault Codes” function.
- Verify Repair: Rerun the fault code scan to confirm that the codes have been cleared and do not reappear.
2. Accessing Live Data (Diagnostics Tab):
- Follow steps 1-3 above to connect and select vehicle, and navigate to “Diagnostics”.
- Select a Module: Choose the module you want to monitor live data from (e.g., Engine Control Unit – ECU).
- Live Data Option: Look for a “Live Data”, “Actual Values”, or similar option within the module’s diagnostic menu.
- Select Parameters: Choose the specific parameters you want to monitor (e.g., engine temperature, RPM, sensor voltages).
- Monitor Data: Xentry will display real-time graphs or numerical values for the selected parameters, allowing you to observe system behavior under different conditions.
3. Using Guided Diagnostics (Diagnostics Tab):
- After a Fault Code Scan (as in step 1), select a specific fault code.
- Guided Diagnostics Option: If available for the selected DTC, a “Guided Diagnostics” or “Troubleshooting Steps” button will appear.
- Follow Instructions: Click on “Guided Diagnostics” and carefully follow the step-by-step instructions, diagrams, and tests provided by Xentry. This feature will guide you through a structured diagnostic process to pinpoint the fault.
These are just a few examples of the tasks you can perform with Mercedes Xentry. As you become more familiar with the software, you’ll discover its vast array of features for in-depth diagnostics, programming, and vehicle maintenance.
Conclusion: Mastering Xentry for Mercedes-Benz Excellence
Mercedes Xentry software is an indispensable tool for anyone working with Mercedes-Benz vehicles. This Xentry tutorial has provided a comprehensive overview of its capabilities, installation process, interface navigation, and practical diagnostic tasks.
By mastering Xentry, you gain the ability to:
- Diagnose complex issues accurately and efficiently.
- Perform dealer-level programming and coding.
- Access official Mercedes-Benz technical information.
- Enhance your automotive repair skills and service quality.
Remember to continuously practice and explore the software’s features to fully unlock its potential. With dedication and this Xentry tutorial as your guide, you’ll be well-equipped to tackle Mercedes-Benz diagnostics with confidence and expertise.
Order now: Xentry Diagnostics Software | Mercedes Benz Dealer Software