Are you wondering if you can leverage the powerful Xentry Diagnostic Simulation software with your VXDIAG Benz C6 DoIP interface? The answer is a resounding yes! This guide will walk you through exactly how to activate and utilize Xentry Simulation Mode with your VXDIAG Benz C6, allowing you to explore the depths of Mercedes-Benz diagnostics without needing a physical vehicle.
Can I Use Xentry Simulation Mode with VXDIAG Benz C6?
Absolutely! VXDIAG Benz C6 owners can indeed benefit from the Xentry Simulation Mode. However, there’s a crucial step to ensure seamless operation: you’ll need to temporarily uninstall the VXDIAG C6 driver in VX Manager. This might sound counterintuitive, but it’s essential for the simulation software to run correctly. Don’t worry, when you’re ready to perform actual vehicle diagnostics again, simply reinstall the C6 driver via VX Manager.
Think of it as switching gears – Simulation Mode requires a different software configuration than live vehicle diagnostics. By removing the driver, you’re essentially preparing your system for a virtual diagnostic environment.
Step-by-Step Guide to Using Xentry Simulation Mode
Now, let’s dive into the practical steps to get you up and running with Xentry Simulation Mode:
-
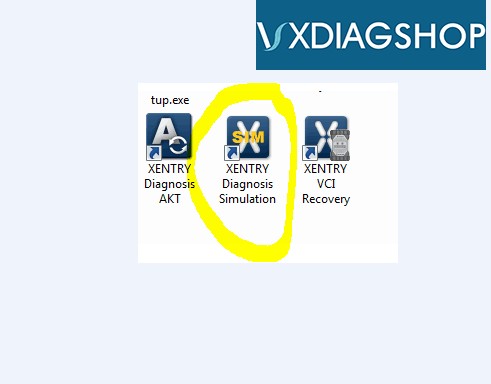
Initiate Xentry Diagnostics Simulation: Begin by launching the “Xentry Diagnostics Simulation” application. This is your gateway to the virtual diagnostic world.
-
Open Xentry Simulation: Within the simulation environment, locate and open “Xentry Simulation.” This action will launch the core simulation interface.
-
Vehicle Model Selection: The software will prompt you to select the specific Mercedes-Benz model you wish to simulate. This is crucial as the simulation needs to mimic a particular vehicle’s systems.
-
Specify Simulation Parameters: Since you’re not physically connected to a vehicle, the system needs precise details for the simulation. This step ensures the virtual environment accurately reflects the chosen model.
-
Choose Model Designation: From the provided list, select the exact model designation, for example, “E 500.” This level of detail is important for accurate simulation.
-
Load Vehicle Data: Click the “diagnosis” button to load the comprehensive vehicle data for your selected model. This populates the simulation with the necessary system information.
-
Manual Ignition Activation: In a real vehicle, turning the ignition is essential. In simulation mode, you must manually activate the ignition within the software interface.
-
Proceed with Simulation: Click “Continue” to advance to the next stage of the simulation setup.
-
Vehicle Configuration and Data Loading: Configure any specific vehicle options or settings as needed and load the complete simulation data. This prepares the virtual vehicle for diagnostic testing.
-
Fault Simulation Setup: To make the simulation realistic and test your diagnostic skills, you can introduce virtual faults. In the control unit window, you can set specific faults that you want to diagnose.
-
System Manipulation (Example: Stationary Heater): The simulation allows you to interact with virtual vehicle components. For instance, you can manipulate the stationary heater system within the simulation to observe its behavior and diagnostic responses.
-
Minimize, Don’t Close: Once the simulation window is active, minimize it to the background. It’s important not to close it completely if you intend to perform further diagnostic actions within the simulation.
-
Perform a Quick Test: Just like on a real vehicle, initiate a “Quick Test” within the simulation. This will scan the virtual vehicle for any active or simulated faults.
-
Fault Detection in Quick Test: If you’ve set up a fault (like with the stationary heater in our example), it should now appear in the quick test results, allowing you to practice fault diagnosis in a safe environment.
-
Actual Value Adjustments: A powerful feature of simulation mode is the ability to modify actual values of systems. In our stationary heater example, you can change the operating rate from “Full load” to “Partial load” to see how the system responds and how these changes are reflected in diagnostic readings. Returning to the diagnosis interface will display these modified actual values.
-
Simulation Program Closure: When you’ve finished your simulation session and terminated the diagnosis within Xentry, remember that the simulation program remains open in the background. You must close the simulation program separately to fully exit.
 xentry-simulator
Image: Xentry Simulation Mode interface demonstrating vehicle selection and diagnostic options within the VXDIAG environment.
Unleash the Power of Xentry Simulation
Xentry Simulation Mode, when paired with your VXDIAG Benz C6, becomes a valuable asset for any Mercedes-Benz technician or enthusiast. It provides a risk-free environment to:
- Practice Diagnostic Procedures: Hone your skills and become proficient with Xentry Diagnostics without the pressure of working on a customer’s vehicle.
- Explore System Functionality: Deeply understand the intricacies of Mercedes-Benz systems and how they respond to various commands and conditions.
- Test Diagnostic Strategies: Experiment with different diagnostic approaches and learn the most efficient ways to pinpoint and resolve faults.
- Train in a Safe Environment: Ideal for training new technicians or for personal learning and development without the need for a physical vehicle.
By following these steps, you can effectively utilize Xentry Simulation Mode with your VXDIAG Benz C6, expanding your diagnostic capabilities and deepening your understanding of Mercedes-Benz vehicle systems. Remember to reinstall your VXDIAG C6 driver when you need to return to real-world vehicle diagnostics!