For automotive technicians and Mercedes-Benz enthusiasts, XENTRY is an indispensable diagnostic tool. Proper setup is crucial to leverage its full capabilities, and a key component of this process involves the Xentry File. This guide will walk you through the essential steps to configure your XENTRY system, ensuring smooth and effective diagnostics for Mercedes-Benz vehicles.
Preparing Your System for XENTRY: Virtualization and the XENTRY File
Before diving into diagnostics, you need to prepare your system environment. This involves enabling virtualization and correctly implementing your xentry file for software activation.
Enabling Virtualization in BIOS
First, ensure virtualization is enabled on your host machine. This is often a prerequisite for running diagnostic software efficiently.
- Access BIOS Settings: Restart your computer and enter the BIOS/UEFI settings (usually by pressing DEL, F2, F10, or F12 during startup – the key varies depending on your motherboard manufacturer).
- Locate Virtualization Settings: Navigate through the BIOS menus to find settings related to “Virtualization,” “Virtualization Technology (VT-x),” “SVM,” or “AMD-V.” These settings are often found under CPU configuration or advanced settings.
- Enable Virtualization: Enable the virtualization option.
- Save and Exit: Save the changes and exit BIOS setup. Your computer will restart.
Installing StarKey Center and Applying Your XENTRY Key
With virtualization enabled, the next step involves using StarKey Center to apply your xentry file, which is essentially your license key for the XENTRY software.
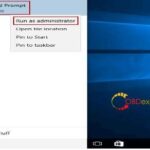
- Open StarKey Center: Launch the StarKey Center application.
- Navigate to Key Input: Locate the section for key input, often labeled “starkeys” or similar.
- Enter Your XENTRY Key: Copy the contents of your xentry file (which typically looks like a long string of characters) and paste it into the designated field within StarKey Center.
- Save the Key: Click “Save” or a similar button to apply the xentry file and activate your software license.
Network Configuration for Diagnostic Communication
Establishing proper network communication is vital for XENTRY to interface with your Mercedes-Benz vehicle. This involves configuring IP addresses on both your host machine and the virtual machine running XENTRY.
Host PC Network Settings
Configure your host computer’s network adapter to facilitate communication with the diagnostic interface.
- Open Network Connections: Go to “Control Panel” > “Network and Sharing Center” > “Network Connections.”
- Local Area Connection Properties: Right-click on your “Local Area Connection” (or Ethernet adapter) and select “Properties.”
- Internet Protocol Version 4 (TCP/IPv4): Select “Internet Protocol Version 4 (TCP/IPv4)” and click “Properties.”
- Set Static IP Address: Choose “Use the following IP address” and enter the following:
- IP address:
172.29.127.128 - Subnet mask:
255.255.255.0
- IP address:
- Click OK: Click “OK” in both properties windows to save the settings.
VM Network Settings in VMware Workstation
Configure VMware Workstation to bridge your virtual machine’s network connection to your host’s Ethernet adapter.
- Open Virtual Network Editor: In VMware Workstation, go to “Edit” > “Virtual Network Editor.”
- Select VMnet0 (Bridged): Choose “VMnet0” (or another VMnet if it’s already bridged to Ethernet, note the number).
- Bridge to Ethernet: In the “Bridged to” dropdown, select your Ethernet adapter.
- Apply Changes: Click “Apply” and then “OK.”
VM Guest Network Settings
Finally, configure the network settings within the virtual machine running XENTRY.
- Start the Virtual Machine: Run your XENTRY virtual machine in VMware Workstation.
- Open Network Connections (VM Guest): Inside the VM, go to “Start” > “Control Panel” > “Network Connections.”
- Local Area Connection Properties (VM Guest): Right-click on “Local Area Connection” and select “Properties.”
- Internet Protocol (TCP/IP) Properties (VM Guest): Select “Internet Protocol Version 4 (TCP/IPv4)” (or simply “Internet Protocol” in older Windows versions) and click “Properties.”
- Set Static IP Address (VM Guest): Choose “Use the following IP address” and enter the same IP address and subnet mask as your host machine:
- IP address:
172.29.127.128 - Subnet mask:
255.255.255.0
- IP address:
- Click OK: Click “OK” in both properties windows to save settings within the VM.
Connecting and Testing Your Diagnostic Setup
With software and network configurations complete, you can now connect your diagnostic hardware and test the XENTRY system.
Connecting Hardware: C4 and OBD Port
- Connect C4 Multiplexer: Connect your Mercedes-Benz C4 multiplexer to your computer via Ethernet cable.
- Connect to OBD Port: Connect the C4 multiplexer to the OBD-II port of your Mercedes-Benz vehicle.
Verifying Connection: SDConnect Indicator
Observe the SDConnect indicator light on your C4 multiplexer.
- Check for Blue Light: The “lock – 01” indicator should turn blue. This indicates successful detection and communication between your laptop and the C4 multiplexer.
Running Quick Scan in DAS
Launch the DAS (Diagnostic Assistance System) application to perform a quick test.
- Run DAS: Double-click the Mercedes-Benz emblem or shortcut to launch DAS.
- Perform Quick Scan: Follow the on-screen prompts to initiate a quick scan of the vehicle’s systems.
If the quick scan completes without errors, your XENTRY system, configured with your xentry file, is functioning correctly and ready for in-depth diagnostics and potentially advanced functions like Vediamo.
Moving to Advanced Diagnostics with Vediamo
With the basic XENTRY/DAS setup verified, you are now prepared to utilize more advanced diagnostic and programming capabilities with software like Vediamo, building upon the foundation established with your correctly implemented xentry file and network configuration.
By following these steps, you can confidently set up your XENTRY system, correctly utilize your xentry file, and ensure reliable diagnostic communication with Mercedes-Benz vehicles. This robust setup empowers you to perform comprehensive diagnostics and maintenance, unlocking the full potential of your XENTRY software.