Working with DTS Monaco opens up a world of possibilities for advanced vehicle diagnostics and customization. If you’re diving into the realm of automotive ECU programming and variant coding, understanding how to navigate tools like DTS Monaco is crucial. Paired with the comprehensive capabilities of Xentry Diagnostics Mega, you gain a powerful combination for in-depth vehicle analysis and modification.
This guide will walk you through the initial steps of using DTS Monaco, assuming you have everything properly set up. It’s important to remember that you’re interacting with your vehicle’s core systems. While variant coding is generally considered safe, always proceed with caution and meticulous documentation. Backing up your coding files is a recommended practice before making any changes. While complete bricking from variant coding is debated, incorrect flashing or software uploads can lead to serious issues. Reflashing to stock might reverse problematic flashes, but it’s a complex process not covered here.
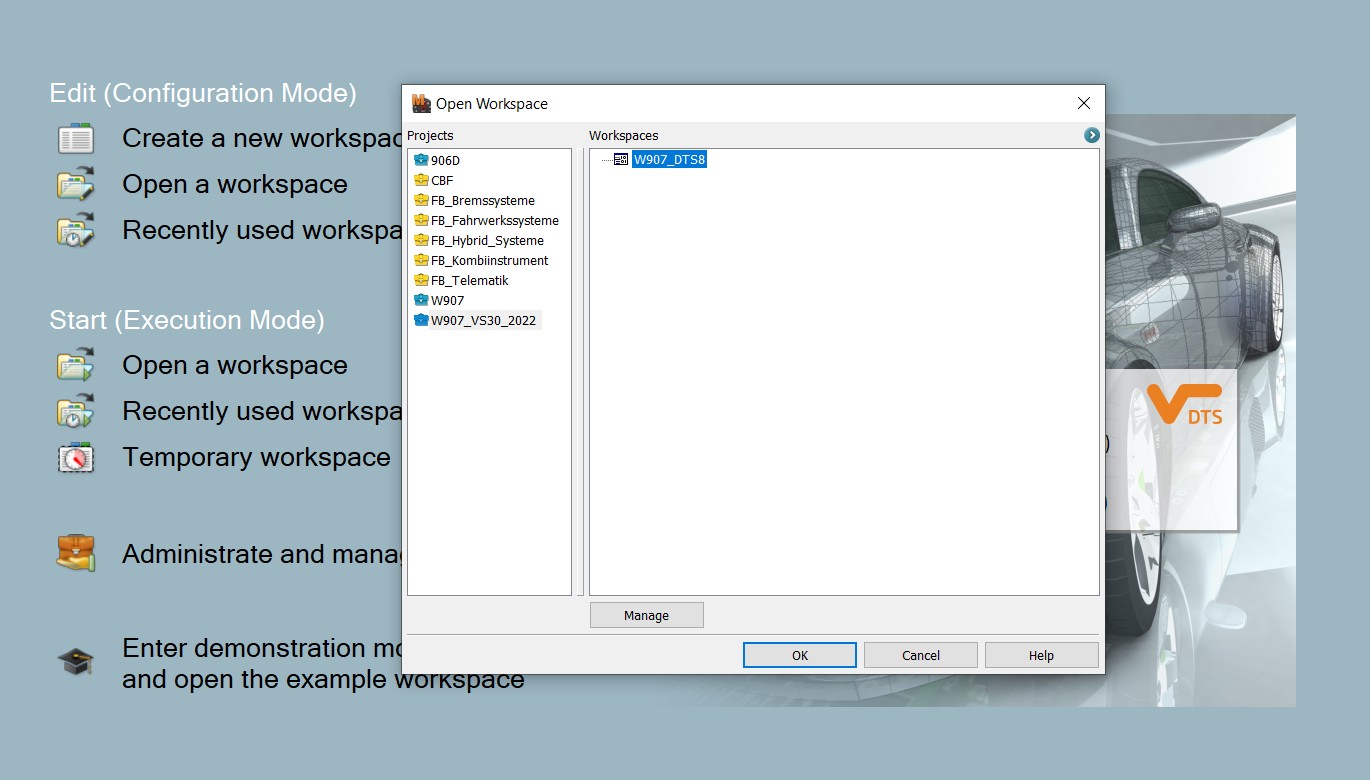
To begin, launch DTS Monaco and click “Open a workspace.” Select the workspace you’ve previously configured. For this guide, we’ll continue using the workspace created for a van.
Upon workspace loading, DTS Monaco might prompt you for an ECU update. Click “NO.” Allow the program to fully load. You should now see your workspace, displaying “Logical Links” on the left side. These links correspond to the SMR-d files imported during project creation. Multiple versions might be listed due to different interface compatibility, but only the active, connected interfaces will be functional. In the example image below, the “HU6” ECU, controlling the MBUX system, is highlighted.
Bypassing Vehicle Firewalls for Xentry Diagnostics Mega Access
Before you can delve into variant coding with DTS Monaco and fully leverage the power of Xentry Diagnostics mega, you’ll likely encounter a firewall. These security measures, implemented by Softing (the creators of DTS Monaco), are designed to restrict unauthorized access to your vehicle’s systems.
Firewall configurations vary depending on your vehicle’s model year and specifications. For the W907 model, firewall access can be achieved through the EZS167 ECU. However, older vans often require firewall deactivation via the BCMFA2 ECU. Let’s explore both methods.
To begin, locate EZS167 in the “Logical Links” list. Right-click on it and select “New Tab for Logical Link.” This action opens the ECU in a new tab, maintaining its connection while allowing you to navigate and open other ECUs simultaneously. Accessing ECUs through the top tabs, in contrast, would close the previous connection upon opening a new one. Keeping the EZS167 (or BCMFA2) connection persistent is crucial during your session.
Once the new tab is open, navigate to “Generic Jobs” and select “Security Access Level 37.” Click the “Transmit” button. A stream of text will appear in the window below. If no red text is present, the firewall should be disabled for older vans.
For newer vans, the process is similar but utilizes “Security Access Level 3B” via the EZS167 ECU. Follow the same steps as above, but select “Security Access Level 3B” instead.
Click “Transmit.” Successful firewall deactivation is indicated by the absence of red text and an “acknowledged” status under “Response State.”
Performing Variant Coding with Xentry Diagnostics Mega and DTS Monaco
With the firewall bypassed, you’re now ready to perform variant coding and utilize the diagnostic depth offered by Xentry Diagnostics mega in conjunction with DTS Monaco. Open the ECU relevant to the feature you wish to modify in a new tab. In this example, we’ll use the MBUX’s “HU6” ECU. After opening the ECU tab, select “Extended Start” and click “Transmit.”
Assuming successful firewall deactivation and maintained ECU connections (EZS167 and/or BCMFA2), you should receive another “acknowledged” Response State. The ECU is now prepared for coding modifications.
Navigate to the “Variant Coding” tab and select your ECU. If it’s not already connected, click “Connect.” Below the ECU, you’ll find the “Domain” list. This section houses the ECU’s functions and the parameters you can adjust. In this example, we’ll select “Audio Handle Write” to illustrate adding a fader and balance feature to the MBUX system.
Locate the desired feature in the “Fragment” column – in this case, “Balance Fader Menue.” Double-click the value under the “Meaning” column. A dropdown menu will appear, allowing you to select your desired new value. The current setting is displayed under “Original Meaning.”
Observe the binary coding strings under “Read from ECU” (current ECU coding) and “Current Coding” (your newly selected value). Once you’re satisfied with your selection, click “Do Coding.” If all preceding steps were executed correctly, the process should complete without pop-up errors. The progress bar next to “Do Coding” will reach 100%, and the “Meaning” column and “Current Coding” will reflect the new value, matching “Read from ECU.”
If you encounter a pop-up error, note the error code and troubleshoot. Common issues include firewall problems or deactivated Extended Start. Restarting the session and re-verifying firewall and Extended Start status is recommended.
Making Variant Coding Changes Permanent with Xentry Diagnostics Mega
While the new values are now active in the ECU, they are not yet permanently saved. To ensure your variant coding changes persist, especially in newer vehicles utilizing Xentry Diagnostics mega systems, a synchronization process is necessary. Older vans might only require a “Hard Reset,” but newer models need additional steps.
Return to the ECU tab where you performed the variant coding. In the “Diagnostic Services” search box, type “[31] Synchronize to Non-volatile Memory Start.” Select it and click “Transmit.” A successful transmission will result in an “acknowledged” Response State without red text errors.
Next, search for “[31] Synchronize to Non-volatile Memory Results,” select it, and click “Transmit.” Again, you should receive an “acknowledged” Response State.
Finally, perform a “Hard Reset” of the ECU. Locate the “[106] ECU Reset – Hard Reset” diagnostic service, select it, and click “Transmit.”
As a final step, power cycle your vehicle. Turn off the van, open the driver’s door, and wait for a few minutes. Afterward, your variant coding changes should be permanently applied. You can verify this by turning the van back on (engine off), reconnecting to the relevant ECU, and checking the setting you modified. In our example, the “Balance Fader Menue” should now reflect the “off” setting we coded.
By following these steps, you can effectively utilize DTS Monaco and Xentry Diagnostics mega to perform variant coding and unlock customization options within your vehicle. Remember to always exercise caution and document your steps throughout the process.