Is your Xentry Connect C5 running slower than you’d like? Many technicians experience sluggish performance with these devices, from lengthy boot times to delays in launching Xentry diagnostics. Unlike simpler interfaces like SDConnect (C4) or VCI (C6), the Xentry Connect C5 is essentially a mini-computer, and its original hardware can be a bottleneck. If you’re looking to improve your Xentry C5 experience and perhaps even searched for “Xentry C5 Download” hoping for a software solution, you might be surprised to learn that the real key to speed lies in a hardware upgrade.
Having spent considerable time working with Xentry Connect C5 units, I decided to delve into the hardware to see if performance improvements were possible. This guide details my journey disassembling and upgrading the Xentry C5, specifically focusing on the CPU, to dramatically boost its speed.
Unveiling the Xentry C5 Internals: A Hardware Overview
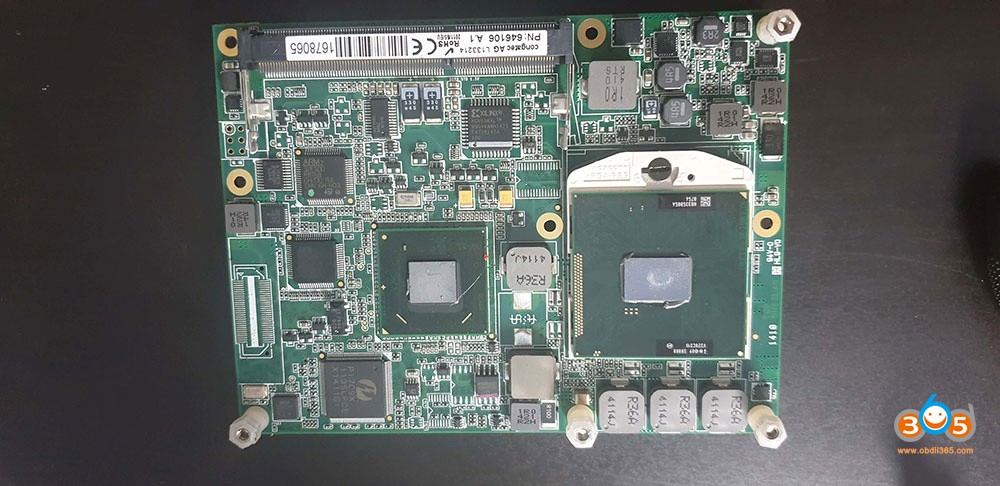
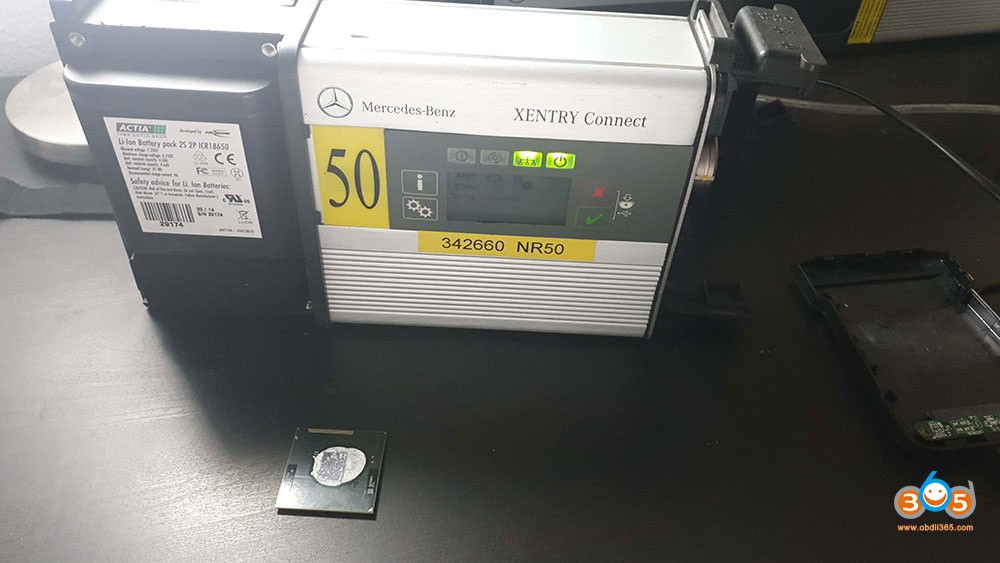
Upon disassembling the Xentry Connect C5, I found it to be equipped with the following components:
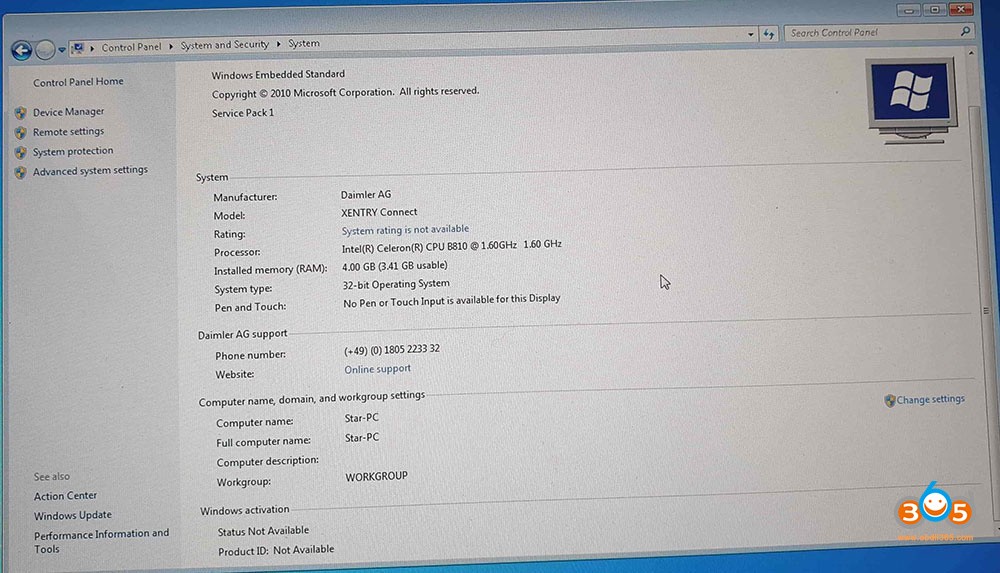
- OS: Windows 7 32bit Embedded
- Motherboard Chipset: HM65
- CPU: Intel Celeron B810 (2 cores, 2 threads, 1.6Ghz, 35w, 2mb L3 cache, PGA989 socket – 2nd Gen) – This is identified as the primary performance bottleneck.
- GPU: Integrated Graphics
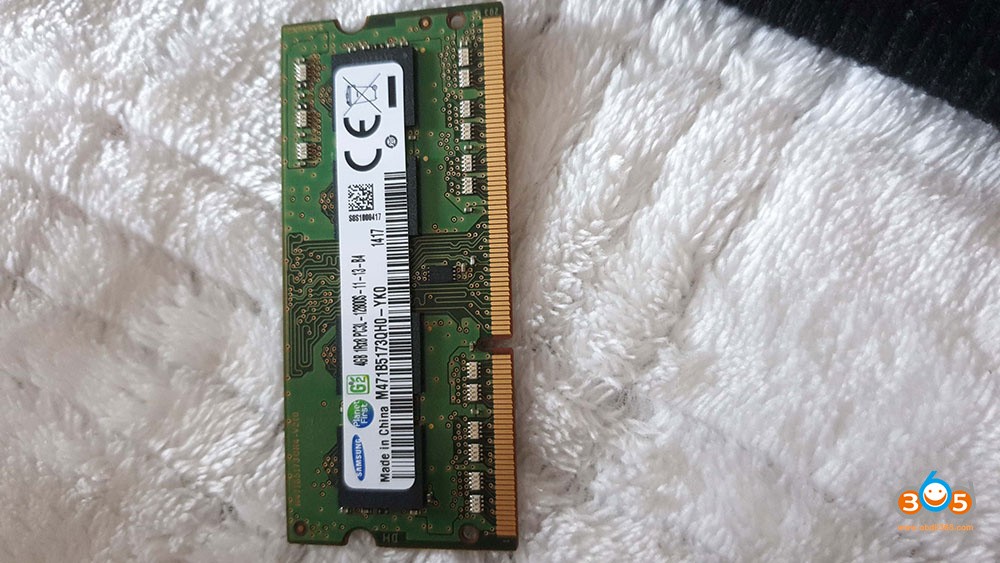
- RAM: 4Gb Samsung DDR3 1333Mhz (Limited to ~3.5Gb usable by 32bit OS)
- SSD: Xmore 256GB (various sizes observed depending on manufacturing date)
- WiFi: Intel Centrino Advanced-N 6205 (2.4Ghz and 5Ghz, 300mbps PCIe Half MiniCard)
The internal architecture reveals that the Xentry Connect C5 is essentially a compact computer running Windows. The Celeron B810 processor, while adequate for basic operation, becomes a significant bottleneck when running demanding diagnostic software like Xentry. This hardware configuration dates back to testing and development as early as 2011, with initial versions appearing around 2012.
Image: Internal components of the Xentry C5 unit after disassembly, highlighting the motherboard and key components.
The Performance Leap: CPU Upgrade to i7
To address the performance limitations, the most impactful upgrade is replacing the Celeron CPU with a more powerful, yet compatible processor. I opted for the Intel Core i7 2640m (2 cores, 4 threads, 2.8Ghz base, 3.5Ghz boost, 4Mb cache, 35w TDP). The crucial factor here is maintaining the 35W Thermal Design Power (TDP) to avoid overheating issues within the Xentry C5’s cooling system.
Performance Benchmarks:
| Task | Celeron B810 | Intel Core i7 2640m | Improvement |
|---|---|---|---|
| Xentry Program Start to Data Status | 57 Seconds | 25 Seconds | 56% Faster |
| Sleep Mode to “No car connected” Status | 47 Seconds | 37 Seconds | 21% Faster |


These benchmarks clearly demonstrate a significant performance increase in Xentry program loading times after the CPU upgrade. The i7 processor delivers a substantially snappier and more responsive user experience.
Important Considerations for CPU Upgrade:
- Wattage (TDP): Stick to 35W TDP processors. Higher wattage CPUs like the 2670qm (4 cores, 8 threads) were tested but caused system shutdown due to power consumption limitations of the motherboard, not overheating.
- 2nd Gen Compatibility: The HM65 chipset motherboard supports 2nd generation Intel Core processors (PGA-989 socket). While 3rd generation processors use the same socket, they are not compatible with this motherboard.
- Cooling: The Xentry C5 cooling system is designed for a 35W TDP CPU. While the i7 2640m also has a 35W TDP, ensure proper thermal paste application during installation to maintain effective heat dissipation.
Image: Close-up view of the CPU socket and cooling system within the Xentry C5 unit, emphasizing the compact design.
Step-by-Step CPU Installation Guide
Caution: Disassembling electronic devices carries risks. Proceed with caution and at your own risk. Ensure the Xentry C5 is powered off and disconnected from any power source before beginning.
- Battery Removal: Begin by removing the battery from the Xentry Connect C5.
- Back Shield Removal: Carefully detach the shield on the backside of the Xentry Connect. It is held in place with double-sided adhesive.
- Radiator Screws: Unscrew the six screws securing the radiator to the motherboard.
- Radiator Removal: Gently lift and remove the radiator.
- CPU Socket Lock: Turn the small black protection piece on the CPU socket to unlock the CPU.
- CPU Replacement: Carefully remove the Celeron CPU and replace it with the i7 2640m. Apply new thermal paste to the CPU before installing the radiator.
- Reassembly: Reassemble the Xentry Connect C5 by reversing steps 1-4. Ensure all components are securely in place.
Image: Step-by-step view of the CPU replacement process, showing the removal of the heatsink and access to the CPU socket.
Exploring Other Upgrade Options: SSD, RAM, and WiFi
While the CPU upgrade provides the most significant performance boost, other components can also be considered for improvement:
- SSD: The stock SSD is sufficient for Xentry, Vediamo, WIS/EPC, and Monaco software. While upgrading to a faster SSD might offer marginal gains, it’s generally not a priority compared to the CPU. Cloning the original SSD to a new one is possible if desired.
- RAM: The 32-bit Windows 7 Embedded OS limits usable RAM to approximately 3.5GB. Upgrading to more than 4GB of RAM is only beneficial if you were to install a 64-bit operating system, which is a more complex undertaking.
- WiFi: The Intel Centrino Advanced-N 6205 WiFi card is decent. Upgrading to a newer card like the Intel AC-7260 is possible for potentially faster and more stable wireless connections. However, driver compatibility issues with the AC-7260 have been reported, and driver installation on the Xentry Connect’s embedded Windows may require remote desktop access and manual driver updates.
Image: Detailed view of the motherboard area showing the RAM slots and WiFi card module.
Software Considerations and Updates
After upgrading the hardware, especially the CPU, ensuring your Xentry software is up-to-date is crucial for optimal performance and compatibility. While this article focuses on hardware, it’s important to address software aspects related to “xentry c5 download” searches.
Xentry Software and Updates:
Typically, “xentry c5 download” searches relate to obtaining or updating the Xentry diagnostic software. For Xentry Connect C5, the software ecosystem involves:
-
Xentry Tab (Laptop Software): This software component resides on your diagnostic laptop and interfaces with the Xentry Connect. It can be installed separately or as part of the Xentry Kit 2.
-
Xentry Connect (Interface Software): This is the software running on the Xentry Connect C5 device itself. It’s essential to keep this updated to the latest compatible version, which, for Xentry Connect C5, is generally Xentry 2020.06. Newer Xentry versions are designed for newer interfaces like Kit 3 or 4.
Updating Xentry Connect Software:
- Download Xentry Kit 2 06-2020 Final Edition: Obtain the software package (link provided in original article attachments).
- Prepare USB Drive: Extract the downloaded files to a minimum 32GB USB drive or external SSD/HDD.
- Initiate Update Mode: Ensure the Xentry Connect is in standby mode. Connect the power supply and insert the USB drive. Start update mode by pressing and holding the “red cross” and “green tick” buttons simultaneously.
- Confirm Update: When “Start update” appears on the display, confirm with the “green tick” button. The update process will begin and take approximately 100 minutes.
- Completion: The Xentry Connect will indicate when the update is finished on the display. You can then press the “gearwheels” button or wait for automatic shutdown.
Image: Xentry Connect C5 display showing the “Start update” prompt during the software update process.
Troubleshooting Common Issues
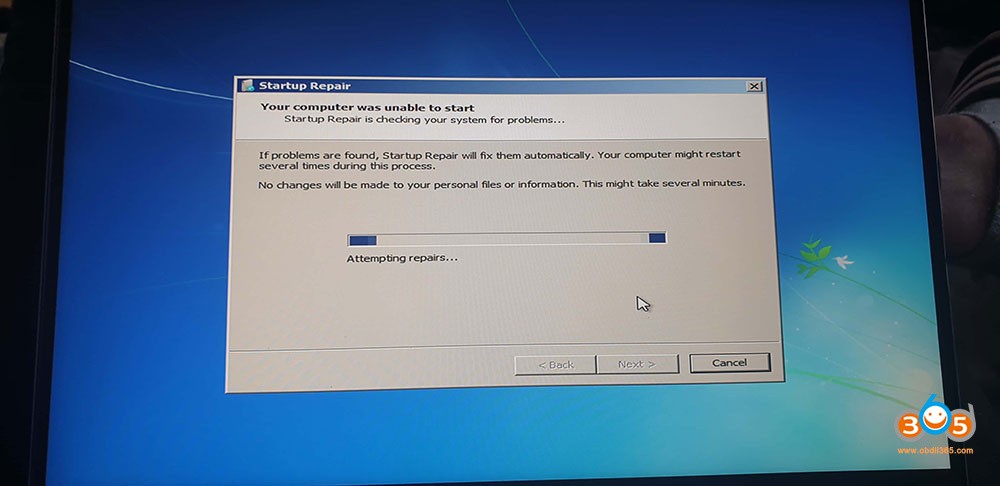
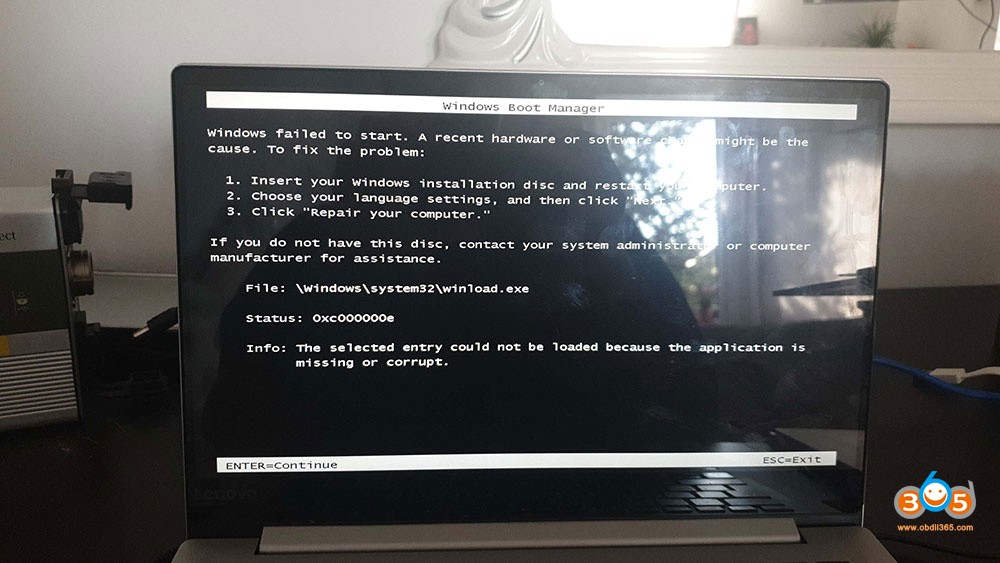
1. Device Booting/Update Loop:
If your Xentry Connect gets stuck in a boot loop or “Device is booting/Update” screen for an extended period, it often indicates a BCD (Boot Configuration Data) corruption issue.
- Solution:
- Create a Windows 7 32-bit bootable USB drive (non-embedded version).
- Boot from the USB drive and select “Repair your computer.”
- Run “Startup Repair.”
- Reinstall the SSD into the Xentry Connect, ensuring it is securely fastened to prevent movement that can cause BCD corruption.
2. Update Errors:
For general update errors:
- Solution: Use the Support Tool to reset the Xentry Connect and then attempt the update again.
- Open Support Tool and navigate to “Reset.”
- Check “I have spoken to the Diagnosis UHD and would like to reset the Xentry Connect.”
- Click “Setting up USB data media” to create a reset USB drive.
- Insert the USB drive into the Xentry Connect and initiate reset mode by pressing “Tick (Green)” and “X (Red)” buttons simultaneously in sleep mode.
- After reset, perform the software update using the 2020.06 Xentry Kit.
3. Display Issues (No Text):
If the display lights up but shows no text, it could indicate various hardware faults, including internal defects, missing display files, or BIOS issues. Further hardware diagnostics may be required in this case.
Image: Xentry Connect C5 Support Tool interface, highlighting the reset options for troubleshooting update errors.
Optional Performance Enhancement: Dust Removal
Even without a CPU upgrade, simply removing the back cover and cleaning accumulated dust from the散热器 and fans can significantly improve cooling and potentially enhance performance by preventing thermal throttling.
Image: Internal view showing significant dust accumulation on the cooling fan and heatsink, emphasizing the need for regular cleaning.
Conclusion: Hardware Upgrade – The True Path to Xentry C5 Speed
While software updates are essential for functionality and compatibility, the most impactful way to improve the performance of your Xentry Connect C5 is through a hardware upgrade, specifically the CPU. By upgrading to a compatible and more powerful processor like the Intel Core i7 2640m, you can experience a dramatically faster and more responsive diagnostic experience. So, if you’ve been frustrated with the sluggishness of your Xentry C5 and searching for solutions, consider taking the hardware upgrade path to truly unleash its potential. And remember, keeping your software updated, potentially through “xentry c5 download” and installation of the latest compatible Xentry Kit, complements the hardware improvements for optimal diagnostic efficiency.
Image: Reassembled Xentry C5 unit after the hardware upgrade, ready for enhanced diagnostic performance.
Credits to @ cloud9atom for original research and insights.
Reliable source for SDConnect C5:
https://www.obdii365.com/wholesale/mb-sd-connect-compact-5-diagnosis.html