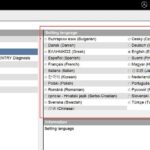
For automotive technicians and Mercedes-Benz enthusiasts, having access to professional diagnostic tools is crucial. Xentry 2014 is a powerful software suite used for diagnosing and troubleshooting Mercedes-Benz vehicles. This guide provides a step-by-step walkthrough on how to install Xentry 2014, enabling you to perform comprehensive diagnostics, coding, and programming.
Preparing Your System for Xentry 2014 Installation
Before you begin the Xentry 2014 Installation process, there are a few essential prerequisites to ensure a smooth setup.
Enabling Virtualization in BIOS
Virtualization is a key requirement for running Xentry 2014 effectively. You’ll need to access your computer’s BIOS settings to enable virtualization.
- Restart your computer.
- As your computer boots up, press the designated key to enter BIOS setup. This key varies depending on your motherboard manufacturer (common keys include Delete, F2, F12, or Esc). Refer to your motherboard manual for the correct key.
- Once in BIOS, navigate to the CPU configuration or Chipset features.
- Look for virtualization options such as “Virtualization Technology (VT-x),” “Intel Virtualization Technology,” or “AMD-V.”
- Enable the virtualization setting.
- Save the changes and exit BIOS. Your computer will restart.
Activating StarKey Center and Applying the Key
StarKey Center is involved in the licensing and activation of Xentry software. You’ll need to input a specific key to activate your installation.
- Open StarKey Center.
- Locate the “starkeys” section within the application.
- Find the “enter/paste the key” field.
- Paste the following key into the designated area:
JY53-LWYN-5STK-DNCV-MTNX-55UZ-LWPX-CNEW-XRWN-LQZA-MG4U-S6P7-W224-9NR7-NH2R-329V-GSZK-V6G4-2SGH-6S64-WR6E-HYWX-Q4MF-L5AA-U7CV-HWGU-5DV3-V2WW-SE5Y-JHYM-J6PQ-VTKX-Z82X-DUWN-A3Z6-W65G-SJPL-UZU7-7E8G-MN2 - Save the entered key within StarKey Center.
Configuring Host PC Network Settings
Proper network configuration on your host computer is crucial for communication between your diagnostic interface and the virtual machine running Xentry.
- Go to “Control Panel” on your Windows host operating system.
- Navigate to “Network and Sharing Center” and then click on “Network Connections.”
- Right-click on your “Local Area Connection” and select “Properties.”
- Scroll down and find “Internet Protocol Version 4 (TCP/IPv4)” and select it.
- Click on “Properties.”
- Choose “Use the following IP address.”
- Enter the following IP address and subnet mask:
- IP address:
172.29.127.128 - Subnet mask:
255.255.255.0
- IP address:
- Click “OK” to save the settings and close the properties window.
- Click “OK” again to close the Local Area Connection Properties window.
Setting Up Virtual Machine Network in VMware Workstation
VMware Workstation is commonly used to run Xentry in a virtualized environment. You need to configure the virtual network settings within VMware to bridge the connection to your physical network adapter.
- Open VMware Workstation.
- Go to “Edit” in the menu bar and select “Virtual Network Editor.”
- In the Virtual Network Editor, locate “VMnet0” (the number might be different in some configurations).
- Select “Bridged” as the network type.
- In the “Bridged to” dropdown menu, choose your Ethernet connection. This is typically your physical network adapter that is connected to your diagnostic interface.
- Click “Apply” and then “OK” to save the virtual network settings.
Configuring Virtual Machine Network Settings
Just like the host PC, the virtual machine running Xentry also needs specific network settings to communicate effectively.
- Start your virtual machine that has Xentry 2014 installed.
- Once the virtual machine is running, go to “Start” menu within the virtual OS.
- Open “Control Panel” and navigate to “Network Connections.”
- Right-click on “Local Area Connection” inside the virtual machine and select “Properties.”
- Select “Internet Protocol (TCP/IP)” or “Internet Protocol Version 4 (TCP/IPv4)” and click “Properties.”
- Choose “Use the following IP address.”
- Enter the same IP address and subnet mask as you used for the host PC:
- IP address:
172.29.127.128 - Subnet mask:
255.255.255.0
- IP address:
- Click “OK” to save the settings and close the properties window.
- Click “OK” again to close the Local Area Connection Properties window in the virtual machine.
Connecting Your Diagnostic Interface and Running DAS
With the network configurations complete, you can now connect your Mercedes-Benz diagnostic interface (like SDConnect C4) and initiate diagnostics using DAS (Diagnostic Assistance System).
- Connect your SDConnect C4 or compatible diagnostic interface to your computer via Ethernet cable.
- Connect the other end of the diagnostic interface to the OBD-II port of the Mercedes-Benz vehicle you intend to diagnose.
- Observe the SDConnect indicator on the bottom right corner of your screen. Look for the lock icon (often labeled “01”) to turn blue. A blue indicator signifies that the C4 interface is detected and communication is established between your laptop and the C4 device.
- Run DAS by double-clicking on the Mercedes-Benz emblem shortcut on your virtual machine desktop.
- Follow the on-screen prompts in DAS to perform a “Quick Test” or vehicle scan.
- If all steps have been correctly followed, DAS should successfully communicate with the vehicle, allowing you to perform diagnostics, access fault codes, and carry out various service functions.
With these steps completed, you should have successfully installed and configured Xentry 2014, and are now ready to use it for in-depth Mercedes-Benz vehicle diagnostics with DAS and potentially Vediamo for more advanced functions. Remember to consult additional resources and official documentation for specific troubleshooting or advanced procedures.
