Mercedes-Benz vehicles are renowned for their complex engineering and advanced technology. To properly diagnose and maintain these sophisticated machines, specialized diagnostic software is essential. Mercedes Xentry DAS (Diagnostic Assistance System) is the go-to software for professionals and serious enthusiasts alike. This article will delve into everything you need to know about Mercedes DAS Xentry Win 10 download, ensuring you have the right information to get started with this powerful tool.
Understanding Mercedes Xentry Diagnostic Software
Mercedes Xentry is more than just software; it’s a comprehensive diagnostic suite designed for Mercedes-Benz, Maybach, and Smart vehicles. It provides in-depth access to vehicle systems, allowing users to perform a wide array of functions, including:
- Reading and Clearing Diagnostic Trouble Codes (DTCs): Identify and resolve issues by accessing error codes from various vehicle modules.
- Actuator Tests: Verify the functionality of components like sensors, valves, and motors.
- Live Data Streaming: Monitor real-time parameters from engine, transmission, braking system, and more.
- Control Unit Adaptations and Programming: Perform advanced functions like SCN coding, variant coding, and software updates (depending on access level and interface).
- Wiring Diagrams and Repair Information: Access detailed technical documentation to aid in diagnosis and repair procedures.
Xentry software is crucial for workshops and individuals who need to perform anything from basic maintenance to complex repairs on Mercedes-Benz vehicles. It bridges the gap between your computer and the vehicle’s internal systems, providing the necessary tools for effective diagnostics.
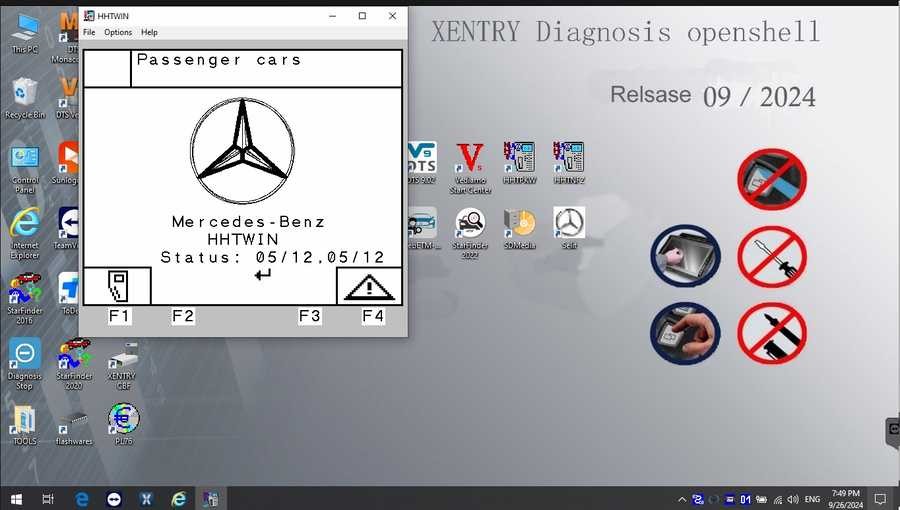
Xentry Versions: OpenShell vs. PassThru
When discussing Mercedes Xentry, you’ll often encounter two primary versions: OpenShell and PassThru. Understanding the difference is key to choosing the right setup for your needs.
-
Xentry OpenShell: This is the full-featured version of Xentry, designed to work with specialized diagnostic interfaces like SD Connect C4/C5/C6. OpenShell offers broader functionality and deeper system access, making it the preferred choice for professional workshops dealing with a wide range of Mercedes-Benz models. It typically requires more robust hardware and a specific setup procedure.
-
Xentry PassThru: This version is designed for use with standard J2534 PassThru devices. PassThru interfaces are more universal and can be used with various vehicle brands. Xentry PassThru provides a subset of the functionality found in OpenShell but is still capable of comprehensive diagnostics, particularly for newer vehicles compliant with PassThru standards. It’s often favored for its flexibility and compatibility with different hardware.
For optimal performance and the widest vehicle coverage, especially for older Mercedes models and advanced functions, Xentry OpenShell paired with an SD Connect C4 DOIP interface is generally recommended.
Preparing for Your Mercedes Xentry Win 10 Download and Installation
Before you proceed with downloading and installing Mercedes Xentry on your Windows 10 system, it’s crucial to ensure your computer meets the necessary specifications and you’ve taken the correct preparatory steps.
System Requirements for Xentry Installation
Running Xentry smoothly requires a capable computer. Here are the recommended minimum specifications:
- Operating System: Windows 10 64-bit is highly recommended for compatibility and performance. While older versions might work, Windows 10 64-bit offers the best stability.
- Processor: Intel Core i5 3rd generation or higher, with a clock speed of 2.3 GHz or faster. A more powerful processor will significantly improve software responsiveness, especially during intensive diagnostic sessions.
- RAM: 8GB of RAM or more. Xentry is a resource-intensive application, and sufficient RAM is crucial for smooth multitasking and preventing slowdowns. 16GB is advisable for optimal performance.
- Storage: At least 25GB of free disk space for the software files and an additional 120GB of free space on your system drive (C:) for the installation process and working files. Solid State Drives (SSDs) are highly recommended over traditional HDDs for faster loading times and overall system responsiveness.
- .NET Framework: Ensure you have .NET Framework 4.8 installed. This is a critical component for Xentry to function correctly on Windows.
- Other: Consider enabling Microsoft Message Queuing (MSMQ) Server feature in Windows Features, as some Xentry functionalities might rely on it.
Pre-Installation Steps: Ensuring a Smooth Process
Before initiating the Xentry installation, take these essential steps to minimize potential issues:
-
Disable Antivirus and Firewall: Antivirus software and firewalls can sometimes interfere with the installation process or flag Xentry files incorrectly. Temporarily disable them before starting the installation and re-enable them after successful setup.
-
Check for VCRedist x86 x64: Verify that Visual C++ Redistributable (VCRedist) x86 and x64 versions are installed on your system. These are common libraries required by many Windows applications, including Xentry. If not present, download and install them from the official Microsoft website.
-
Free Up Disk Space: Ensure you have ample free space on your system drive (C:) as per the storage requirements mentioned earlier. Uninstall unnecessary programs or move large files to another drive if needed.
-
Administrator Privileges: Run the Xentry installation as an administrator. Right-click on the setup file and select “Run as administrator” to grant the necessary permissions for installation.
Step-by-Step Guide to Installing Mercedes Xentry on Windows 10
Once you’ve prepared your system, follow these detailed steps to install Mercedes Xentry:
-
Mount the Xentry ISO File: If you downloaded Xentry as an ISO image file, you’ll need to mount it. In Windows 10, you can usually right-click on the ISO file and select “Mount.” This will create a virtual DVD drive containing the Xentry installation files.
-
Run the Setup Application: Navigate to the mounted virtual drive and locate the setup application, typically named “XDOS” or “Setup.exe”. Double-click to run it.
-
Follow the Installation Prompts: The Xentry installer will guide you through the installation process.
- Language Selection: Choose your preferred language for the software interface.
- Installation Path: It’s generally recommended to install Xentry in the default location suggested by the installer.
- Component Selection: In most cases, you can proceed with a “Full Installation” to ensure all necessary components are installed.
- Patience is Key: The installation process can take a considerable amount of time, sometimes several hours, depending on your system speed and the Xentry version. Allow the installation to proceed uninterrupted.
-
Reboot Your Computer: After the installation completes, the installer will prompt you to restart your computer. Reboot is crucial to finalize the installation and ensure all components are properly loaded.
-
Post-Reboot Checks: After restarting, verify that your antivirus software is still disabled if you intend to proceed with any software activation or patching steps that might be required for your Xentry version.
-
Software Activation/Patching (If Applicable): Depending on your Xentry source and intended usage, you might need to perform software activation or apply patches. These steps are highly version-specific and often involve using key generators or replacing certain files. Exercise caution when obtaining and applying activation methods from unofficial sources, as they may pose security risks. This article does not endorse or provide instructions for illegal software activation.
-
Activation Key Input (If Required): If your Xentry version requires an activation key, you will be prompted to enter it during the initial software launch. Obtain a legitimate activation key from authorized sources.
-
Final Verification: Launch Xentry and connect to a Mercedes-Benz vehicle using a compatible diagnostic interface. Perform basic diagnostic functions to verify that the software is working correctly and communicating with the vehicle.
Troubleshooting Common Xentry Installation Failures
Despite careful preparation, you might encounter issues during Xentry installation. Here are some common reasons for failed installations and how to address them:
- Incorrect Activation Key: Ensure you are using a valid and correct activation key if required. Double-check for typos and obtain the key from a trusted source.
- Antivirus/Firewall Interference: Confirm that your antivirus and firewall were completely disabled during the entire installation process. Sometimes, simply disabling them through the user interface is not enough; you might need to temporarily uninstall them for a clean installation.
- Insufficient Disk Space: Verify that you have enough free disk space on your system drive (C:). Xentry requires substantial space for installation and operation.
- Previous Xentry Version Conflicts: If you had a previous version of Xentry installed, ensure it was completely uninstalled before attempting to install a new version. Use a dedicated uninstaller tool to remove all traces of the old installation, including registry entries and leftover files.
- System Incompatibility: Double-check that your computer meets the minimum system requirements, especially the operating system (Windows 10 64-bit), processor, and RAM.
If you continue to experience difficulties, consider seeking assistance from specialized technical support or forums dedicated to Mercedes-Benz diagnostics.
Downloading Mercedes Xentry: Sources and Considerations
Obtaining Mercedes Xentry software requires careful consideration of the source. Legitimate copies of Xentry are typically available through authorized Mercedes-Benz dealerships and diagnostic software providers. However, these sources often come with significant costs and may require proof of professional automotive repair credentials.
Caution Regarding Unofficial Downloads:
You might find “free” downloads of Mercedes Xentry online through various forums and file-sharing websites. However, exercise extreme caution when considering these sources:
- Security Risks: Unofficial downloads are often bundled with malware, viruses, and Trojans that can compromise your computer and network security.
- Software Instability: Unofficial versions may be incomplete, corrupted, or lack essential updates, leading to software instability and unreliable diagnostic results.
- Legal Issues: Downloading and using pirated software is illegal and unethical.
Recommendation:
For professional use and to ensure software integrity and legal compliance, it is strongly recommended to obtain Mercedes Xentry from authorized and reputable sources, even if it involves a higher upfront cost. This will save you from potential security risks, software malfunctions, and legal repercussions in the long run.
Conclusion: Mastering Mercedes Diagnostics with Xentry
Mercedes Xentry DAS is an indispensable tool for anyone working with Mercedes-Benz vehicles. By understanding the software, preparing your system correctly, and following the installation steps carefully, you can successfully set up Mercedes DAS Xentry Win 10 download and unlock its powerful diagnostic capabilities. Remember to prioritize legitimate software sources and always practice safe computing habits when dealing with diagnostic software.
For further information on Mercedes-Benz diagnostic tools and related equipment, visit https://www.obd2tool.com.