For automotive professionals and Mercedes-Benz enthusiasts, having access to robust diagnostic software is crucial. While the landscape of diagnostic tools is constantly evolving, the need for reliable software like Xentry remains paramount. Many users still search for terms like “Xentry 2016 Download,” reflecting a broad interest in accessing effective diagnostic solutions. This guide will provide a comprehensive overview of Mercedes-Benz Xentry diagnostic software, including its relevance to contemporary needs and how to navigate the download and installation process.
Understanding Mercedes Xentry Diagnostic Software
Mercedes Xentry is the official diagnostic software used for Mercedes-Benz vehicles. It provides workshops and technicians with advanced capabilities for diagnosing, troubleshooting, and repairing Mercedes-Benz cars and trucks. This powerful tool allows for in-depth system analysis, enabling users to read and clear error codes, conduct actuator tests, perform module programming, and access comprehensive repair information.
While you might be searching for “xentry 2016 download,” it’s important to understand that diagnostic software evolves to support newer vehicle models and technologies. The latest versions, such as Xentry Openshell 10/2024 and Xentry Passthru 10/2024, offer the most up-to-date coverage and functionalities. However, understanding the foundations of Xentry, as represented by versions like 2016, is still valuable for grasping the software’s overall capabilities.
Key functionalities of Mercedes Xentry software include:
- Error Code Reading and Clearing: Quickly identify and resolve diagnostic trouble codes (DTCs).
- Actuator and Component Testing: Verify the functionality of individual components and systems.
- Full Vehicle System Diagnostics: Access and analyze data from all electronic control units (ECUs) within the vehicle.
- Repair and Maintenance Information: Integrate with systems like WIS (Workshop Information System) and EPC (Electronic Parts Catalog) for repair guidance and parts information.
- Programming and SCN Coding: Perform software updates and configurations on vehicle modules (certificate may be required for newer models).
For optimal performance, Xentry software is typically used with specific diagnostic interfaces. Xentry Openshell 10/2024 is designed to work seamlessly with interfaces like SD Connect C4 DOIP, SD Connect C5, and VCI C6, with SD Connect C4 DOIP often recommended for its reliability. Xentry Passthru 10/2024 supports J2534 compliant devices, offering compatibility with a broader range of diagnostic tools, including VAS5054, Autel, and Open Port devices.
Image: Screenshot of Mercedes-Benz Xentry car diagnostic software interface, displaying vehicle system information.
Image: Interface of Mercedes-Benz Xentry truck diagnostic software, showcasing system diagnostic options.
This comprehensive software suite often includes:
- DAS (Diagnostic Assistance System): For automated diagnostics and fault finding. Supports newer vehicle registrations for diagnosis.
- Xentry: The core diagnostic application, crucial for diagnosing newer Mercedes-Benz models post-2009.
- WIS net (Workshop Information System): Provides wiring diagrams, component locations, and detailed maintenance procedures. Access vehicle-specific data by entering the chassis number.
- EPC.net (Electronic Parts Catalog): Allows users to look up and identify genuine Mercedes-Benz parts.
- ST Finder: Part location finder with options for different years including 2016, 2020, and 2022.
- STARUTILITIES: For system management and self-testing of the diagnostic system.
- SDMEDIA: Multimedia resources and training materials.
- PL76: Pricing and labor time information (specific to certain regions/versions).
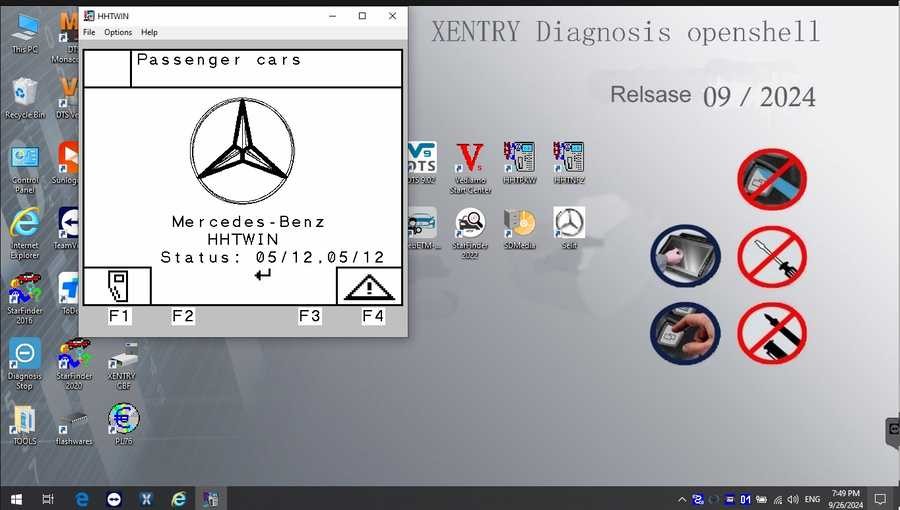
- HHT-WIN: Software for diagnosing older Mercedes-Benz vehicles.
- Vediamo & DTS Monaco (Engineer Versions): Advanced engineering and programming tools for in-depth vehicle modifications and analysis, updated to recent versions with enhanced functionalities like improved DAS integration and offline programming capabilities.
Installing Xentry Diagnostic Software: Step-by-Step Guide
Proper installation is vital for the stable operation of Xentry diagnostic software. While specific steps may slightly vary between versions, the general process remains consistent. Ensure your computer meets the recommended specifications:
- Operating System: Windows 10 64-bit is highly recommended for compatibility and performance.
- Storage: Allocate sufficient disk space, ideally 23GB free before installation and 110GB available for the installation process itself.
- Processor: An Intel Core i5 3rd generation processor (around 2.3 GHz or faster) is recommended for smooth operation.
- RAM: 8GB of RAM or more will ensure adequate system responsiveness.
- .NET Framework: Ensure .NET Framework 4.8 is installed as it is a prerequisite for the software to run correctly.
Follow these steps for installing Xentry Diagnostic software:
Step 1: Disable Antivirus and Firewall
Temporarily disabling your antivirus and firewall is crucial to prevent interference during the installation process.
- Open “Windows Security” via the search bar.
- Navigate to “Virus & threat protection” settings.
- Under “Real-time protection,” toggle the switch to “Off.”
- Confirm any prompts to allow the change.
Image: Screenshot showing how to disable real-time protection in Windows Security settings.
Step 2: Run the Software Installer
- Before initiating Xentry OpenShell installation, verify that VCRedist x86 x64 is enabled on your system.
- Locate the software folder and find the “XDOS” executable.
- Right-click on “XDOS” and select “Mount” to start the installation.
- Allow the installation process to run without interruption. Note that it may take several hours to complete depending on your system speed and software version.
Image: Illustration of mounting the Xentry software installation file, typically labeled “XDOS”.
Image: Prompt to run applications as administrator and select preferred language during installation.
Image: Screenshot showing prompts to ensure sufficient disk space and verify .NET Framework 4.8 installation.
Step 3: Reboot Your Computer
After the Xentry installation process completes, the system will prompt you to reboot your computer. Allow the system to restart to finalize the installation.
Image: System notification to reboot the computer after completing Xentry software installation.
Step 4: Re-disable Antivirus (If Necessary)
After restarting, check if your antivirus software has automatically re-enabled itself. If so, repeat Step 1 to disable it again as it may interfere with software activation or initial use.
Image: Instruction to re-disable antivirus software if it has been automatically reactivated after system reboot.
Step 5: Disable Xentry PDF Background Processes
To optimize system resources, disable Xentry PDF background processes using Task Manager. Access Task Manager by right-clicking on the Windows taskbar.
Step 6: Software Cracking and File Insertion
Navigate to the CLO drive as instructed by your software provider to locate and insert any necessary crack files for OpenShell activation. This step is crucial for using the software without licensing restrictions in some contexts.
Image: File explorer view showing navigation to the CLO drive, indicating the location for crack files.
Image: Closer view of the CLO drive contents, highlighting the crack files to be used for software activation.
Image: Illustration of inserting the crack files into the designated directory within the CLO drive to activate the software.
Step 7: Software Activation
Activate the software using the provided ID to generate an Activation Key. Follow the instructions provided with your software package to obtain and enter the key.
Image: Screenshot of the software activation window, prompting for an activation key based on a provided ID.
Step 8: Save Activation Key
Securely save the generated Activation Key for future reference and potential re-activation needs.
Step 9: Modify LAN ID (If Required)
Modify the LAN ID if instructed as part of the activation process. This step might be specific to certain software versions or licensing methods.
Step 10: Verify and Use the Software
After completing all steps, launch Xentry to verify successful installation and activation. You should now be able to use the full functionalities of the Mercedes-Benz diagnostic software.
Image: Confirmation screen showing successful activation of Xentry software and readiness for diagnostic use.
Troubleshooting Installation Failures
Installation issues can arise due to several factors. Common reasons for failed Xentry software installation include:
- Incorrect Activation Key: Ensure the activation key is entered correctly and is valid for your software version.
- Antivirus/Firewall Interference: Confirm that antivirus and firewall software were completely disabled throughout the entire installation process.
- Insufficient Disk Space: Verify that your computer meets the storage requirements, both for file storage and the installation process itself.
- Previous Xentry Version Conflicts: Ensure any previous versions of Xentry software were completely and properly uninstalled before installing a new version.
If you encounter persistent difficulties, consider seeking professional assistance from Dealers Software or authorized support channels. They can provide expert guidance and efficient solutions to resolve installation problems, saving you time and potential frustration.
For more information on Mercedes-Benz diagnostic tools and software solutions, visit https://www.xentryportal.store.