Mercedes-Benz vehicles are renowned for their sophisticated engineering and advanced technology. To properly maintain and diagnose these complex machines, specialized diagnostic tools are essential. Among these, Mercedes Xentry Diagnostic software stands out as a powerful and comprehensive solution. When paired with the reliable C5 interface, it offers mechanics and enthusiasts alike unparalleled access to vehicle systems. This guide will delve into everything you need to know about Mercedes DAS Xentry, focusing on the download and utilization of the C5 compatible version.
Understanding Mercedes Xentry Diagnostic Software
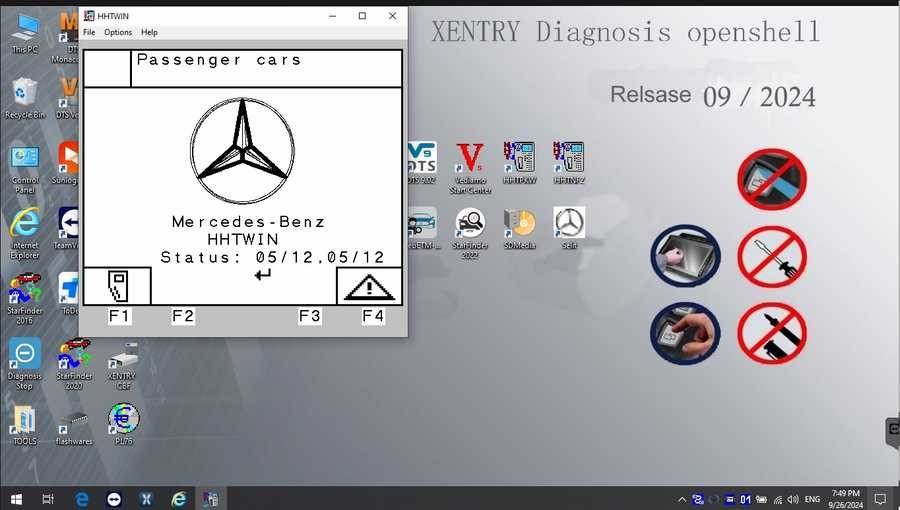
Mercedes Xentry is the official diagnostic software suite used for Mercedes-Benz vehicles. It’s a multifaceted tool designed to perform a wide array of functions, from basic error code reading to complex system reprogramming. For anyone working on Mercedes-Benz cars, from independent repair shops to dedicated enthusiasts, Xentry is indispensable.
Key Capabilities of Mercedes Xentry:
- Comprehensive System Diagnostics: Xentry provides in-depth access to all electronic control units (ECUs) within a Mercedes-Benz vehicle. This includes engine management, transmission control, braking systems (ABS, ESP), airbag systems, chassis, and body electronics.
- Fault Code Reading and Clearing: The software accurately reads diagnostic trouble codes (DTCs) stored in the vehicle’s ECUs, providing valuable insights into potential issues. It also allows for the clearing of these codes after repairs are completed.
- Actuation and Component Testing: Xentry enables users to activate various vehicle components to test their functionality. This is crucial for pinpointing faulty sensors, actuators, or wiring issues.
- Live Data Monitoring: Real-time data streams from sensors and systems can be monitored, allowing for dynamic analysis of vehicle performance and identification of intermittent faults.
- Adaptations and Programming: Certain vehicle components require adaptation or programming after replacement. Xentry facilitates these procedures, ensuring proper system integration and functionality.
- Repair and Maintenance Information: Integrated with Xentry are resources like WIS (Workshop Information System) and ASRA (Arbeitstexte, Standardtexte, Richtzeiten, Arbeitswerte), providing repair instructions, wiring diagrams, component locations, and labor times, streamlining the repair process.
Why Choose Xentry with C5 Interface?
While Xentry software is versatile, its effectiveness is maximized when used with compatible hardware interfaces. The SD Connect C5 is a popular and robust interface specifically designed for Mercedes-Benz diagnostics. It offers several advantages:
- Enhanced Communication Reliability: The C5 interface provides a stable and high-speed communication link between the diagnostic computer and the vehicle, crucial for accurate data transfer and reliable diagnostics.
- Wider Vehicle Compatibility: SD Connect C5 is compatible with a broad range of Mercedes-Benz models, including older and newer vehicles, making it a versatile tool for workshops dealing with diverse Mercedes fleets.
- Durability and Build Quality: Typically built to withstand the demanding environments of automotive workshops, C5 interfaces are designed for longevity and consistent performance.
For users seeking “Mercedes Das Xentry Download C5,” it’s important to understand that the “C5” refers to the hardware interface compatibility, not a specific software version name. You’ll be downloading the latest Xentry software compatible with C5, such as Xentry Openshell, ensuring you have the most up-to-date diagnostic capabilities for Mercedes-Benz vehicles up to the current model year.
Step-by-Step Guide to Downloading and Installing Mercedes Xentry
Installing Mercedes Xentry can seem daunting, but by following a structured approach, the process can be managed efficiently. Here’s a detailed guide to help you through the installation:
1. System Requirements and Preparation:
Before initiating the download and installation, ensure your computer meets the necessary specifications to run Xentry smoothly.
- Operating System: Windows 10 or Windows 11 (64-bit versions are mandatory for optimal performance and compatibility).
- Processor: Intel Core i5 3rd generation or higher, with a clock speed of 2.3 GHz or faster. A more powerful processor will contribute to faster software operation.
- RAM: At least 8GB of RAM is recommended. 16GB or more will provide even better performance, especially when running multiple diagnostic applications simultaneously.
- Storage: Ensure you have ample free disk space. A minimum of 23GB is needed for the software files, and an additional 110GB is required for the complete installation process. Solid State Drives (SSDs) are highly recommended over traditional Hard Disk Drives (HDDs) for significantly faster installation and software loading times.
- .NET Framework: Verify that .NET Framework 4.8 is installed on your system. This is a critical prerequisite for Xentry to function correctly.
- Disable Antivirus and Firewall: Temporarily disable your antivirus software and Windows Firewall before starting the installation. These security measures can sometimes interfere with the installation process and lead to errors. Remember to re-enable them after the installation is complete.
Steps to Disable Antivirus and Firewall (Windows 10 example):
- Click on the Windows search bar and type “Windows Security.”
- Select “Virus & threat protection.”
- Click on “Manage settings” under “Virus & threat protection settings.”
- Toggle the switch under “Real-time protection” to “Off.”
- Confirm any prompts that appear to disable real-time protection.
- To disable the firewall, go back to “Windows Security” and select “Firewall & network protection.”
- Choose your active network profile (Domain network, Private network, or Public network).
- Toggle the switch under “Windows Defender Firewall” to “Off.”
- Confirm any prompts.
2. Software Download and Installation:
- Source the Software: Obtain the Mercedes Xentry software from a reputable source. For “mercedes das xentry download c5,” ensure the version you download is compatible with the C5 interface and covers the vehicle models you intend to diagnose. It is important to note that official Xentry software is typically accessed through Mercedes-Benz dealerships and authorized channels. Software obtained from unofficial sources may carry security risks or licensing issues.
- Mount the Software Image: Xentry software often comes as an ISO image file. You’ll need to “mount” this image to access its contents as a virtual drive. In Windows 10 and later, you can simply right-click on the ISO file and select “Mount.”
- Run the Installer: Navigate to the mounted virtual drive and locate the setup or installation file (usually named “setup.exe” or similar, sometimes within a folder like “XDOS”).
- Initiate Installation: Double-click the installer file to begin the installation process.
- Follow On-Screen Instructions: The Xentry installer will guide you through the setup. Pay close attention to each step and follow the prompts carefully. You will likely be asked to choose an installation language and accept license agreements.
- Component Selection: During installation, you might be given options to select specific Xentry components to install. For full diagnostic capability, it is generally recommended to install all available components unless you have specific storage constraints.
- Installation Time: Xentry is a comprehensive software suite, and the installation process can take a significant amount of time, potentially several hours. Ensure your computer is connected to a stable power source and allow the installation to proceed uninterrupted.
3. System Reboot and Post-Installation Steps:
- Reboot Your Computer: After the installation process reaches completion, the installer will likely prompt you to reboot your computer. Allow the system to restart to finalize the installation.
- Re-disable Antivirus (If Re-enabled): After restarting, check if your antivirus software and firewall have been automatically re-enabled. If so, disable them again as they might interfere with the software’s activation or operation.
- Software Activation: Xentry software typically requires activation. The activation process can vary depending on the source of your software. It might involve using an activation key, a license file, or contacting a server for online activation. Follow the specific activation instructions provided with your software package. Steps 6-9 in the original article refer to a specific cracking/activation process which is not officially endorsed and may carry risks. For legitimate use, obtain Xentry through official channels to ensure proper licensing and support.
- Verify Installation: After activation, launch the Xentry software to verify that it starts up correctly without errors. Connect your SD Connect C5 interface to your computer and then to a Mercedes-Benz vehicle to test the diagnostic connection and basic functionality.
Troubleshooting Common Xentry Installation Issues
Even with careful adherence to instructions, installation issues can sometimes arise. Here are some common problems and their potential solutions:
- Incorrect Activation Key: If you encounter activation errors, double-check the activation key you entered. Ensure you are entering it exactly as provided, paying attention to case sensitivity and character accuracy. If the key is indeed incorrect, you will need to obtain a valid activation key from your software provider.
- Antivirus/Firewall Interference: If installation fails or the software doesn’t run correctly after installation, antivirus or firewall interference is a prime suspect. Ensure these are completely disabled during installation and runtime (though for security best practices, consider adding Xentry as an exception in your antivirus/firewall rules instead of permanently disabling them).
- Insufficient Disk Space: If you receive errors related to disk space during installation, verify that you have enough free space on your designated installation drive. Clear up unnecessary files or applications to free up space and restart the installation.
- Previous Xentry Version Conflicts: Conflicts can occur if a previous version of Xentry was not completely uninstalled before installing a new one. Use a dedicated uninstaller tool or manually remove all traces of the old installation, including program files, registry entries, and configuration folders, before attempting a fresh installation.
- .NET Framework Issues: If Xentry fails to install or run and you suspect .NET Framework is the problem, ensure that .NET Framework 4.8 is installed and properly enabled in Windows Features. You can also try repairing the .NET Framework installation through the Control Panel.
- Software Compatibility: Ensure the Xentry software version you are installing is compatible with your operating system and the SD Connect C5 interface you are using. Check the software documentation or provider information for compatibility details.
If you continue to experience difficulties, seeking assistance from technical support associated with your software source or consulting online forums dedicated to Mercedes-Benz diagnostics can be helpful resources.
Optimizing Your Mercedes Diagnostics with Xentry and C5
Once you have successfully downloaded, installed, and activated your Mercedes Xentry software and connected it with your SD Connect C5 interface, you are equipped with a powerful diagnostic system. To optimize your diagnostic workflow:
- Regular Software Updates: Keep your Xentry software updated to the latest version. Updates often include bug fixes, improved vehicle coverage, and new diagnostic features, ensuring you have access to the most current capabilities.
- Familiarize Yourself with the Software: Take time to explore the various menus, functions, and options within Xentry. Practice using the software on test vehicles or in simulation mode to become proficient in navigating and utilizing its features effectively.
- Utilize WIS/ASRA Integration: Leverage the integrated Workshop Information System (WIS) and ASRA resources within Xentry. These provide invaluable repair information, wiring diagrams, and procedures directly within the diagnostic environment, streamlining troubleshooting and repair processes.
- Proper Interface Handling: Handle your SD Connect C5 interface with care. Store it in a safe and dry place when not in use. Ensure the cables are in good condition and connections are secure during diagnostics to maintain reliable communication.
- Continuous Learning: The field of automotive diagnostics is constantly evolving. Stay updated on new diagnostic techniques, software features, and vehicle technologies by participating in training courses, workshops, and online communities related to Mercedes-Benz diagnostics.
By mastering Mercedes Xentry and effectively using the SD Connect C5 interface, you can achieve a high level of diagnostic capability for Mercedes-Benz vehicles, enabling efficient and accurate troubleshooting and repairs.
Disclaimer: This guide is for informational purposes only and provides general steps for Mercedes Xentry software download and installation based on publicly available information and the provided original article. Obtaining and using automotive diagnostic software should be done in accordance with manufacturer guidelines and legal regulations. xentryportal.store is not responsible for any issues arising from the use of this information.