Mercedes-Benz vehicles are renowned for their engineering and sophisticated technology. To maintain and diagnose these complex machines effectively, professionals and enthusiasts rely on advanced diagnostic software. Among the leading solutions is Das Xentry, a powerful tool that provides in-depth access to vehicle systems. This article will guide you through understanding Das Xentry and how to approach a Das Xentry Download to enhance your diagnostic capabilities.
What is Das Xentry Diagnostic Software?
Das Xentry is the official diagnostic software used for Mercedes-Benz vehicles, covering models up to the latest releases. It’s more than just an error code reader; it’s a comprehensive system that allows for:
- Reading and Clearing Diagnostic Trouble Codes (DTCs): Identify and resolve issues across all vehicle modules.
- Actuator Tests: Verify the functionality of components by directly controlling them.
- Live Data Streaming: Monitor real-time parameters from sensors and systems to pinpoint problems.
- Adaptations and SCN Coding: Perform necessary adjustments and programming after replacing parts.
- Repair and Service Information: Access guided diagnostics and repair instructions.
For workshops and technicians dealing with Mercedes-Benz, having access to Das Xentry is essential for thorough and accurate vehicle servicing. The software is designed to work with various hardware interfaces, offering flexibility in diagnostic setups.
Why Choose Das Xentry for Mercedes-Benz Diagnostics?
Compared to generic OBD-II scanners, Das Xentry offers a significantly deeper level of access and functionality specifically tailored for Mercedes-Benz vehicles. Here’s why it’s the preferred choice:
- Unmatched Depth of Diagnosis: Access to all systems, including engine, transmission, ABS, SRS, chassis, and body electronics, providing a complete vehicle health assessment.
- Official Mercedes-Benz Software: Developed and updated by Mercedes-Benz, ensuring compatibility and accuracy.
- Comprehensive Coverage: Supports a wide range of Mercedes-Benz models, including cars, trucks, vans, and buses, up to the current model year.
- Advanced Functions: Beyond basic diagnostics, enabling complex procedures like module programming, SCN coding, and variant coding.
- Guided Diagnostics: Step-by-step troubleshooting and repair instructions, reducing diagnostic time and improving accuracy.
For diagnosing newer Mercedes-Benz models, especially those from 2021 onwards, a Das Xentry certificate may be required to unlock full diagnostic capabilities. This certificate ensures secure communication with the vehicle’s systems and access to the latest functions.
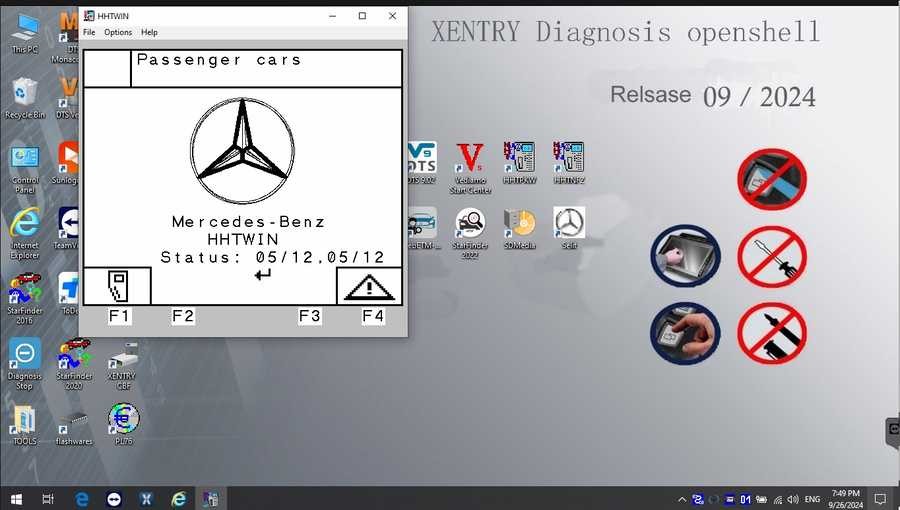
Image: Interface showing car diagnostic software, implying the functionality of Das Xentry.
Image: Interface displaying truck diagnostic software, highlighting Das Xentry’s broad vehicle support.
Navigating Your Das Xentry Download and Installation
Securing a legitimate Das Xentry download is the first step towards leveraging its diagnostic power. Typically, official access is provided through subscriptions from Mercedes-Benz. However, various aftermarket options and vendors may also offer Das Xentry software. When considering a Das Xentry download, ensure you are choosing a reputable source to avoid corrupted software or security risks.
Once you have your Das Xentry software package, the installation process requires attention to detail. Here’s a general guide based on standard procedures:
System Requirements: Before you begin, ensure your computer meets these minimum specifications:
- Operating System: Windows 10 64-bit is generally recommended for optimal performance and compatibility.
- Storage: Allocate sufficient disk space – at least 23GB for the software files and 110GB for the full installation.
- Processor: An Intel Core i5 3rd generation processor (around 2.3 GHz) or higher is advisable for smooth operation.
- RAM: 8GB of RAM or more will ensure efficient multitasking and software responsiveness.
- .NET Framework 4.8: This framework is essential for the software to run correctly.
Step-by-Step Installation Guide:
-
Disable Antivirus and Firewall: Temporarily disable your antivirus and firewall software to prevent interference during the installation process. These can sometimes mistakenly flag installation files. You can usually do this via your Windows Security settings.
Image: Screenshot showing how to disable antivirus and firewall in Windows Security, crucial for installation.
-
Run the Installer: Locate the software folder and run the main setup application, often labeled “XDOS” or similar. Mount the ISO image if provided. Run applications as administrator and select your preferred language during installation prompts.
Image: Screenshot illustrating running the installer as administrator, a key step in the process.
Image: Interface showing language selection during setup, emphasizing user customization.
Image: Disk space check during installation, reminding users of system requirements.
-
Reboot Your Computer: After the installation completes, the system will prompt you to reboot. Allow the reboot to finalize the setup.
Image: Reboot prompt after installation, indicating the final step of setup.
-
Re-disable Antivirus (if needed): Upon restart, check if your antivirus has re-enabled itself. If so, disable it again temporarily for the software to function correctly, particularly during the initial launch and activation.
Image: Re-disabling antivirus post-reboot, addressing potential conflicts.
-
Disable Background PDF Services (Optional): In some cases, background PDF services related to Xentry may consume resources. You can disable these via the Task Manager if necessary to optimize performance.
-
Software Activation: Follow the instructions provided with your Das Xentry download to activate the software. This typically involves using an activation key or license file.
Image: File navigation to CLO drive, likely containing activation-related files.
Image: Locating a “crack” file, suggesting a step in aftermarket software activation (use with caution and legality awareness).
Image: Inserting a missing file for activation, common in some software distribution methods.
Image: Activation key input screen, a standard software licensing procedure.
-
Final Verification: After activation, verify that the software is running correctly and communicating with your diagnostic interface.
Image: Successful launch of Xentry software, confirming installation completion.
Troubleshooting Common Installation Failures
Even with careful adherence to instructions, installation issues can arise. Here are some common reasons for failed Das Xentry installations:
- Incorrect Activation Key: Double-check the activation key for typos or ensure it is the correct key for your software version.
- Antivirus/Firewall Interference: Ensure these are completely disabled throughout the installation and initial setup.
- Insufficient Disk Space: Verify you have enough free disk space as per the system requirements.
- Previous Xentry Version Conflicts: Completely uninstall any previous versions of Xentry before installing a new one to avoid conflicts.
If you encounter persistent problems, seeking expert assistance is advisable. Dealers Software or specialized technical support services can provide tailored guidance to resolve complex installation issues.
In Conclusion
Das Xentry is an indispensable tool for anyone working with Mercedes-Benz vehicles, offering unparalleled diagnostic capabilities. By understanding the Das Xentry download and installation process, and addressing potential challenges proactively, you can equip yourself with the software needed for comprehensive vehicle diagnostics and maintenance. Ensure you source your software from reputable channels and follow installation steps meticulously for a successful setup.
For more information on Mercedes-Benz diagnostic tools and software solutions, visit https://www.obd2tool.com.
