For automotive technicians and Mercedes-Benz enthusiasts, having access to advanced diagnostic software is crucial. Mercedes-Benz Xentry is a powerful tool used to diagnose and troubleshoot issues in Mercedes-Benz vehicles. If you’re searching for a Free Download Benz Mb Star Xentry, you’ve come to the right place to understand what this software is, its capabilities, and how to navigate the installation process effectively. This guide will provide you with essential information to make informed decisions about acquiring and utilizing this valuable diagnostic tool.
Understanding Mercedes-Benz Xentry Diagnostic Software
Mercedes Xentry Diagnostic software is the official diagnostic platform for Mercedes-Benz vehicles. It’s designed to provide in-depth access to vehicle systems, far beyond the capabilities of generic OBD-II scanners. Specifically developed for Mercedes-Benz, Xentry offers comprehensive functionalities that are essential for accurate and efficient vehicle servicing and repair up to models from 2024.
Key Features and Benefits of Xentry:
- Extensive System Diagnostics: Xentry can access and diagnose virtually every system in a Mercedes-Benz vehicle, including engine, transmission, ABS, SRS, chassis, body control modules, and more. This deep level of access allows for precise identification of faults.
- Fault Code Reading and Clearing: Quickly read Diagnostic Trouble Codes (DTCs) and clear them after repairs. Xentry provides detailed descriptions of fault codes, aiding in accurate diagnosis.
- Actuator Tests: Perform functional tests on various vehicle components (actuators) to verify their operation. This is crucial for pinpointing problems and ensuring proper repairs.
- Live Data Streaming: Monitor real-time data parameters from sensors and modules, enabling you to observe vehicle performance under different conditions and identify anomalies.
- Adaptations and Programming: In some cases, Xentry allows for component adaptations and basic programming functions, essential after replacing certain parts or modules.
- Repair and Maintenance Information: While not always directly within the Xentry software itself, it often integrates with or links to Mercedes-Benz’s Workshop Information System (WIS) and Electronic Parts Catalog (EPC), providing repair procedures, wiring diagrams, and parts information.
- Support for Latest Models: Xentry is continuously updated to support the latest Mercedes-Benz models, ensuring compatibility with new technologies and systems up to the specified version year (e.g., 2024 in the current version).
Xentry Openshell vs. Xentry Passthru:
It’s important to distinguish between two main versions of Xentry:
- Xentry Openshell: This is the full-featured version of Xentry, designed to work with Mercedes-Benz diagnostic multiplexers like SD Connect C4/C5 and VCI C6. Openshell provides the most comprehensive diagnostic capabilities.
- Xentry Passthru: This version is designed for use with generic J2534 Passthru devices. Passthru offers a more limited set of functionalities compared to Openshell but allows for diagnostics using less specialized hardware. It’s often used when workshops need to diagnose Mercedes-Benz vehicles alongside other brands using a universal interface.
Hardware Compatibility:
To effectively use Xentry, you’ll need compatible diagnostic hardware.
- SD Connect C4/C5 & VCI C6: These are Mercedes-Benz specific multiplexers recommended for use with Xentry Openshell, offering the best performance and full functionality. SD Connect C4 DOIP is particularly recommended for newer vehicles utilizing the Diagnostic over IP protocol.
- J2534 Passthru Devices: For Xentry Passthru, generic J2534 devices from brands like VAS5054, Autel, and Open Port can be used. However, ensure the device is fully compliant with J2534 standards for reliable operation.
The Xentry Certificate Requirement:
For diagnosing newer Mercedes-Benz models, especially those from 2021 onwards, an Xentry certificate is often required. This certificate is a security measure implemented by Mercedes-Benz to protect vehicle systems and data. Certificates are typically obtained through official channels, often from authorized Mercedes-Benz software providers or dealers. This certificate enables full diagnostic capabilities for recent models up to 2024.
V2024.09 Car / V2024.10 Truck MB Star C4/C5 BENZ Diagnostic Software with Xentry/ DAS/ EPC/ WIS/ Vediamo/ DTS
V2024.09 Car MB Star C4/C5 BENZ Diagnostic Software:
V2024.10 Truck MB Star C4/C5 BENZ Diagnostic Software:
This comprehensive software suite often includes:
- DAS (Diagnostic Assistance System): An older diagnostic system, still used for some older models, but generally replaced by Xentry for newer vehicles.
- Xentry: The primary diagnostic application for Mercedes-Benz vehicles from 2009 onwards.
- WIS (Workshop Information System): Provides repair manuals, wiring diagrams, and component locations.
- EPC (Electronic Parts Catalog): Allows users to look up genuine Mercedes-Benz parts and part numbers.
- ST Finder: A tool to locate part locations within the vehicle.
- STARUTILITIES: System management and self-test tools for the diagnostic system itself.
- SDMEDIA: Training videos and multimedia resources related to diagnostics and repair.
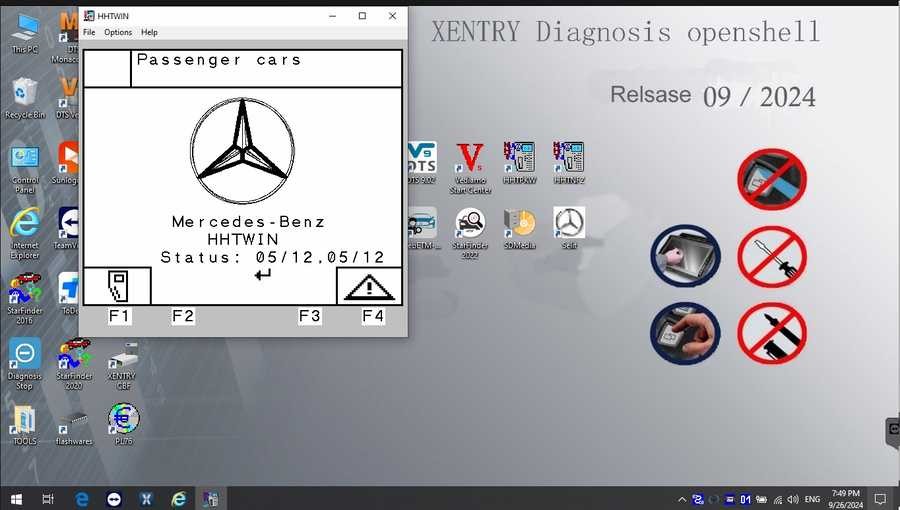
- PL76 & HHT-WIN: Software for older Mercedes-Benz models and systems.
- Vediamo & DTS Monaco: Engineering software versions used for advanced programming, coding, and module configuration – typically used by specialists.
This integrated software package provides a complete solution for Mercedes-Benz diagnostics and repair.
Step-by-Step Guide to Installing Xentry Diagnostic Software
Installing Xentry Diagnostic software requires careful attention to detail to ensure a successful and error-free setup. Before you begin, it’s critical to verify that your computer meets the necessary system requirements.
System Requirements:
- Operating System: Windows 10 64-bit is highly recommended for compatibility and performance.
- Storage: Ensure you have ample storage space. At least 23GB of free space for the software files and a minimum of 110GB of free space on your hard drive for the installation process itself. SSD (Solid State Drive) is recommended for faster installation and operation.
- Processor: An Intel Core i5 3rd generation processor (approximately 2.3 GHz or faster) is the minimum requirement. For optimal performance, a more powerful processor is beneficial, especially for smoother operation and faster data processing.
- RAM: 8GB of RAM is the minimum, but 16GB or more is highly recommended for better multitasking and overall system responsiveness, especially when running virtual machines or other diagnostic tools simultaneously.
- .NET Framework: Ensure that .NET Framework 4.8 is installed on your system as Xentry relies on this framework to function correctly.
Installation Steps:
Follow these steps methodically for a successful Xentry installation:
Step 1: Disable Antivirus and Firewall
It’s crucial to disable your antivirus software and firewall temporarily as they can interfere with the installation process and flag essential files as false positives.
- Windows Security: Type “Windows Security” in the search bar and select it.
- Virus & threat protection: Click on “Virus & threat protection.”
- Manage settings: Under “Virus & threat protection settings,” click on “Manage settings.”
- Real-time protection: Toggle the “Real-time protection” switch to the “Off” position.
- User Account Control: Confirm any prompts from User Account Control to allow the change.
Disabling your antivirus and firewall is a temporary step for installation.
Step 2: Run the Software Installer
- Enable VCRedist: Before launching the Xentry installer, ensure that “VCRedist x86 x64” (Visual C++ Redistributable) is enabled on your system. This is often a prerequisite for many Windows applications.
- Locate Installer: Navigate to the folder containing your Xentry software package.
- Mount the ISO: If the software is provided as an ISO image file (common for large software packages), right-click on the “XDOS” ISO file and select “Mount.” This will mount the ISO as a virtual drive.
- Initiate Installation: Open the mounted virtual drive and locate the setup or installation executable file (often named “setup.exe” or similar). Double-click to run it.
- Run as Administrator: Right-click on the installer executable and select “Run as administrator” to ensure the installer has the necessary permissions to make changes to your system.
- Language Selection: During the installation process, you’ll likely be prompted to select your preferred language. Choose accordingly.
- Installation Time: Be patient, as the Xentry installation process can be lengthy, often taking several hours to complete depending on your system specifications. Avoid interrupting the installation once it has begun.
Step 3: Reboot Your Computer
- Restart Prompt: After the main installation phase is complete, the installer will likely prompt you to reboot your computer. It is essential to restart your system at this point to allow the changes to take effect.
Step 4: Re-disable Antivirus (If Re-enabled)
- Check Antivirus Status: After restarting, Windows Security might automatically re-enable real-time protection. Check the status of your antivirus and firewall again.
- Disable Again: If your antivirus has been re-enabled, repeat the steps from Step 1 to disable it once more. This is sometimes necessary for the software activation or cracking process (depending on the source and nature of your software).
Step 5: Disable Xentry PDF Background Process (Optional but Recommended)
- Task Manager: Right-click on the Windows taskbar and select “Task Manager.”
- Background Processes: Look for any processes related to “Xentry PDF” or similar in the “Background processes” section.
- End Task: If you find any such processes running, select them and click “End task.” This step is often recommended to prevent potential conflicts or resource usage from background PDF viewers associated with Xentry.
Step 6: Software Activation/“Cracking” (Proceed with Caution)
- Locate Crack Files: This step is highly dependent on the source of your “free download benz mb star xentry” software. Often, unofficial or “free” versions require a “crack” or activation process to bypass licensing. These files are typically located in a separate folder or provided with instructions.
- Navigate to CLO Drive: The instructions might direct you to a specific drive letter, often “CLO” or similar, where you need to place or run these crack files. This drive might be a virtual drive created during the installation or a specific partition.
- Follow Instructions Carefully: Carefully follow the instructions provided with your downloaded software for applying the crack or activation. This often involves copying files to specific locations, running executable files, or modifying system settings.
Step 7: Activate with Activation Key (If Required)
- Generate ID: Run the Xentry software. It might prompt you to generate an “ID” or “Call ID.”
- Obtain Activation Key: Use the provided ID and a key generator or contact the software provider (if you obtained a paid or legitimate version) to get an “Activation Key.”
- Enter Activation Key: Enter the Activation Key into the Xentry software when prompted.
Step 8: Save Activation Key Securely
- Record Key: Keep a record of your Activation Key in a safe place. You might need it again if you reinstall the software or encounter activation issues.
Step 9: Modify LAN ID (Network Configuration – If Necessary)
- LAN ID Setting: In some cases, you might need to modify the LAN ID or network adapter settings within Xentry, particularly if you are using specific diagnostic interfaces or network configurations. Consult the software instructions or hardware documentation if this step is required.
Step 10: Verify and Utilize the Software
- Launch Xentry: Run the Xentry Diagnostic software.
- Connect to Vehicle: Connect your diagnostic interface (SD Connect, J2534 device, etc.) to your computer and the Mercedes-Benz vehicle.
- Test Connection: Verify that Xentry recognizes the interface and establishes a connection with the vehicle.
- Start Diagnostics: Begin using the software for vehicle diagnostics, fault code reading, actuator tests, live data monitoring, and other functions as needed.
Reasons for a Failed Installation
Even with careful adherence to the installation steps, you might encounter issues. Here are some common reasons for Xentry installation failures:
- Incorrect Activation Key: If you are using a version that requires activation, an invalid or incorrectly entered Activation Key will prevent the software from functioning. Ensure you have a valid key for your software version.
- Antivirus/Firewall Interference: Failing to completely disable antivirus and firewall software during the entire installation and activation process is a frequent cause of errors. Ensure they are disabled until the software is fully installed and activated.
- Insufficient Disk Space: Running out of disk space during installation will halt the process and can lead to corrupted files. Double-check that you have the required free space on your hard drive before starting.
- Previous Xentry Version Conflicts: If you had a previous version of Xentry installed, remnants of the old installation can conflict with the new one. Completely uninstall any previous versions, including related files and registry entries, before installing a new version. Using a dedicated uninstaller tool can be helpful.
If you continue to experience difficulties after troubleshooting these common issues, it is recommended to seek professional support. While the search term is “free download benz mb star xentry,” remember that obtaining software from unofficial sources carries risks, including potential malware and instability. For legitimate and reliable software and support, consider contacting authorized Mercedes-Benz software providers or dealers. They can offer assistance with installation and ensure you have a properly licensed and functioning diagnostic system.
For more information on Mercedes-Benz diagnostic tools and related equipment, please visit https://www.obd2tool.com.