Mercedes-Benz vehicles are renowned for their complex engineering and advanced technology. To properly diagnose and maintain these sophisticated machines, specialized diagnostic software is essential. Xentry Diagnostic software is the tool of choice for professionals and enthusiasts alike. If you’re searching for “xentry free download,” you’ve come to the right place to understand your options and learn about this powerful diagnostic tool. This guide will explore Mercedes Xentry, its capabilities, how to access it, and the installation process.
Understanding Mercedes-Benz Xentry Diagnostic Software
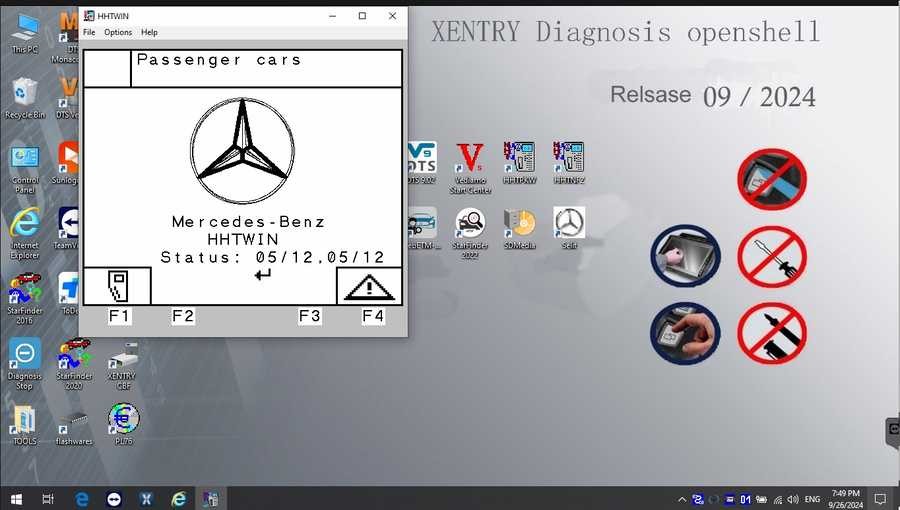
Mercedes Xentry is the official diagnostic software suite used for Mercedes-Benz, Maybach, and Smart vehicles. It provides in-depth access to vehicle systems, allowing technicians to perform a wide range of tasks, from basic error reading to complex system programming. Specifically, the latest versions like Xentry Openshell 10/2024 and Xentry Passthru 10/2024 offer comprehensive coverage for models up to the end of 2024.
Xentry’s capabilities include:
- Reading and clearing diagnostic trouble codes (DTCs): Identify and resolve issues across all vehicle systems.
- Actuator tests: Verify the functionality of components like sensors, valves, and motors.
- Comprehensive system diagnostics: Analyze engine, transmission, ABS, SRS, chassis, and all other electronic control units (ECUs).
- Repair and maintenance information: Access guided diagnostics and repair procedures.
- Programming and SCN coding: Perform software updates and configuration changes (certificate may be required for newer models).
For optimal performance and compatibility, Xentry is designed to work with specific hardware interfaces. Xentry Openshell 10/2024 is ideally used with connectors like SD Connect C4 DOIP, SD Connect C5, and VCI C6, with SD Connect C4 DOIP being the recommended option for its robust performance. Xentry Passthru 10/2024 supports J2534 compliant devices, including popular options like VAS5054, Autel, and Open Port, offering flexibility in hardware choices.
To diagnose the very latest Mercedes-Benz models from 2021 onwards, a valid Xentry certificate is often necessary. This certificate, typically obtained through authorized channels like Dealers Software, unlocks full diagnostic capabilities for these newer vehicles, ensuring you can service models up to 2024 with confidence.
Is Xentry Free Download Possible? Navigating Your Options
The term “xentry free download” is frequently searched, reflecting a desire to access this powerful software without cost. However, it’s crucial to understand the realities of obtaining Xentry.
Official Channels: The official and most legitimate way to access Xentry is through subscription or purchase from Mercedes-Benz or authorized dealerships. This ensures you receive genuine software, updates, and technical support. This route typically involves a significant investment but guarantees legality and reliability.
“Free” Alternatives and Associated Risks: You might encounter sources online offering “xentry free download” or “xentry crack.” These sources are almost always unofficial and carry substantial risks:
- Software Piracy: Downloading from unofficial sources is illegal and unethical, infringing on Mercedes-Benz’s intellectual property.
- Malware and Viruses: Unofficial downloads are frequently bundled with malware, viruses, and other malicious software that can harm your computer and compromise your data.
- Outdated and Unreliable Software: “Free” versions are often outdated, lacking the latest vehicle coverage and diagnostic capabilities. They may also be unstable and prone to errors.
- No Support or Updates: Unofficial versions come with no technical support or software updates, leaving you vulnerable to bugs and compatibility issues.
Legitimate Access and Cost-Effective Solutions: While a completely “free download” of the latest Xentry version is not a safe or legal option, consider these approaches:
- Subscription Services: Explore subscription options from authorized vendors that may offer more flexible and potentially less expensive access compared to outright purchase.
- Older Versions: For diagnosing older Mercedes-Benz models, older versions of Xentry might suffice and could potentially be found at a lower cost from reputable sources (though “free” is still unlikely for legitimate software).
- Consider your Needs: If you are an enthusiast or DIYer, assess if you truly need the full capabilities of the latest Xentry. Perhaps a more affordable, aftermarket diagnostic tool can meet your requirements for basic tasks.
Recommendation: For professional use or for comprehensive and reliable diagnostics, obtaining Xentry through official channels is strongly recommended. While the initial cost may be higher, it ensures you have a legitimate, safe, and fully functional tool with ongoing support and updates. Be extremely cautious of “xentry free download” offers as they are likely to be illegal and harmful.
[Image of V2024.09 Car MB Star C4/C5 BENZ Diagnostic Software with alt text: Mercedes Benz Star Diagnostic Software V2024.09 Car Version Interface]
[Image of V2024.10 Truck MB Star C4/C5 BENZ Diagnostic Software with alt text: Mercedes Benz Star Diagnostic Software V2024.10 Truck Version Display]
Step-by-Step Guide to Installing Xentry Diagnostic Software
If you have obtained a legitimate copy of Xentry Diagnostic software, either through purchase or subscription, the installation process generally follows these steps. Please note: These steps are a general guide, and specific instructions may vary depending on your Xentry version and source. Always refer to the official installation documentation provided with your software.
Before you begin, ensure your computer meets the minimum system requirements:
- Operating System: Windows 10 64-bit is highly recommended for compatibility and performance.
- Storage: Allocate at least 23GB of free space for the software files and 110GB for the installation itself. Sufficient disk space is crucial for a successful installation.
- Processor: An Intel Core i5 3rd generation processor (around 2.3 GHz) or higher is recommended for smooth operation. Faster processors will improve performance.
- RAM: 8GB of RAM or more is necessary for Xentry to run efficiently. More RAM will enhance multitasking and responsiveness.
- Required Feature: Ensure .NET Framework 4.8 is installed on your system. Xentry relies on this framework to function correctly.
Installation Steps:
-
Disable Antivirus and Firewall: Temporarily disable your antivirus and firewall software. These security programs can sometimes interfere with the installation process by incorrectly flagging Xentry files.
- Open “Windows Security” by typing it in the search bar.
- Select “Virus & threat protection.”
- Click on “Manage settings” under “Virus & threat protection settings.”
- Toggle “Real-time protection” to “Off.” Confirm any prompts.
[Image of Disabling Antivirus and Firewall 1 with alt text: Windows Security Center showing Real-time protection setting for Xentry Installation]
-
Run the Software Installer: Locate the Xentry software installation files you obtained.
- Enable VCRedist: Before starting, ensure “VCRedist x86 x64” is enabled on your system. This is a prerequisite for Xentry.
- Mount the ISO: If your software is provided as an ISO image (common for large software packages), “Mount” the image to access its contents.
- Run as Administrator: Navigate to the installation folder, typically containing a file named “XDOS” or “Setup.” Right-click on the installer file and select “Run as administrator.” This ensures the installer has the necessary permissions to make changes to your system.
- Language Selection: Choose your preferred language for the installation process and the software interface.
- Installation Time: Be patient; Xentry installation can take several hours depending on your system speed and software version. Allow the process to complete without interruption.
[Image of Running Software from Designated Folder 1 with alt text: Xentry Installation Folder with XDOS installer highlighted]
[Image of Running Software from Designated Folder 2 with alt text: Xentry Installation Language Selection Screen]
[Image of Running Software from Designated Folder 3 with alt text: Xentry Installation Progress Screen]
-
Reboot Your Computer: After the initial installation phase, the installer will likely prompt you to reboot your computer. Restart your system to allow the changes to take effect.
[Image of Computer Reboot Prompt with alt text: Xentry Installation Reboot Required Message]
-
Re-disable Antivirus (if needed): After restarting, check if your antivirus software has automatically re-enabled itself. If so, disable it again temporarily, as it might still interfere with the software activation or initial launch.
[Image of Re-disabling Antivirus after Reboot with alt text: Windows Security Center showing Real-time protection re-enabled after reboot for Xentry setup]
-
Disable Xentry PDF Background Processes: To optimize performance, disable Xentry’s PDF viewer from running in the background. Access Task Manager by right-clicking on the Windows taskbar. Look for any Xentry-related PDF processes and end them.
-
Software Activation/Cracking (If Applicable): Depending on your Xentry version and license, you may need to activate the software. “Cracking” steps are often associated with unofficial versions and are not recommended for legitimate software. Follow the activation instructions provided with your genuine software license. This might involve copying files to specific folders (like the “CLO” drive, if applicable to your version).
[Image of Navigating to CLO Drive for Activation 1 with alt text: Windows Explorer showing CLO Drive for Xentry Activation Files]
[Image of Navigating to CLO Drive for Activation 2 with alt text: CLO Drive contents showing files for Xentry software activation]
[Image of Navigating to CLO Drive for Activation 3 with alt text: Files being copied to CLO Drive for Xentry software activation process]
-
Activate with Activation Key: If required, use the provided Activation Key (from your legitimate purchase) to activate the software. You may need to input a software ID to generate an activation key.
[Image of Activation Key Input Screen with alt text: Xentry Activation Window prompting for Activation Key]
-
Save Activation Key: Securely store your Activation Key for future reference or re-installations.
-
Modify LAN ID (If Necessary): In some cases, you may need to modify the LAN ID as part of the activation process. Follow the instructions provided with your software if this step is required.
-
Verify and Utilize: Launch Xentry Diagnostic software. Verify that it starts correctly and that all features are functioning as expected. Reconnect your diagnostic interface to your computer and vehicle to begin diagnostics.
[Image of Xentry Software Interface after Successful Installation with alt text: Xentry Diagnostic Software Main Interface Display]
Troubleshooting Common Xentry Installation Issues
Even with careful adherence to instructions, installation issues can sometimes arise. Here are common reasons for failed Xentry installations and how to address them:
- Incorrect Activation Key: Double-check the Activation Key you entered. Ensure it is the correct key provided with your legitimate software license and that you have entered it accurately. Typos are a common cause of activation failures.
- Antivirus and Firewall Interference: If you didn’t disable your antivirus and firewall completely or if they re-enabled during installation, they might have blocked critical files. Ensure these are disabled throughout the entire installation and activation process. You might need to add exceptions for Xentry installation folders in your antivirus settings if problems persist.
- Insufficient Disk Space: Verify that you have enough free disk space on your designated installation drive (at least 110GB). Low disk space can cause installation to fail or result in incomplete installations. Free up space by deleting unnecessary files or programs.
- Previous Xentry Version Conflicts: If you had a previous version of Xentry installed, ensure it was completely uninstalled before attempting to install a new version. 残留 files from older installations can cause conflicts. Use a dedicated uninstaller tool or follow the official uninstallation procedures for your previous version.
- System Requirements Not Met: Re-check that your computer meets the minimum system requirements, especially regarding the operating system, processor, RAM, and .NET Framework version. Upgrading your system or using a compatible computer might be necessary.
Seek Professional Assistance: If you encounter persistent difficulties despite troubleshooting, consider seeking professional help. If you obtained your software through authorized channels, contact their technical support. For complex issues, expert assistance can save you time and prevent further complications.
For more information about Mercedes-Benz diagnostic tools and solutions, please visit https://www.obd2tool.com.