For automotive repair professionals and enthusiasts working with Mercedes-Benz vehicles, Xentry software is an indispensable diagnostic tool. This comprehensive system allows for in-depth analysis, troubleshooting, and programming of Mercedes-Benz vehicles. Proper installation is crucial to ensure Xentry functions correctly and provides accurate diagnostic information. This guide will walk you through the complete Xentry installation process, ensuring a smooth setup for your diagnostic needs.
Before you begin the Xentry installation, it’s essential to prepare your computer system. Firstly, ensure your operating system is Windows 10, as newer versions of Xentry are designed to run optimally on this platform and do not support older systems like Windows 7. Secondly, you need to disable the Secure Boot option in your BIOS settings. This step is critical as it allows for the necessary system modifications required for Xentry to operate without conflicts. Accessing BIOS settings usually involves pressing a specific key (like Delete, F2, or F12) during your computer’s startup sequence – consult your motherboard manual for the exact key. Disabling Secure Boot is a common requirement for running specialized automotive software and will not negatively impact your system’s security for diagnostic purposes.
Step-by-Step Xentry Installation Guide
The following steps outline the process to install Xentry Diagnostic OpenShell. While the screenshots may reference an older version, the installation procedure remains consistent for newer versions like 12.2023.
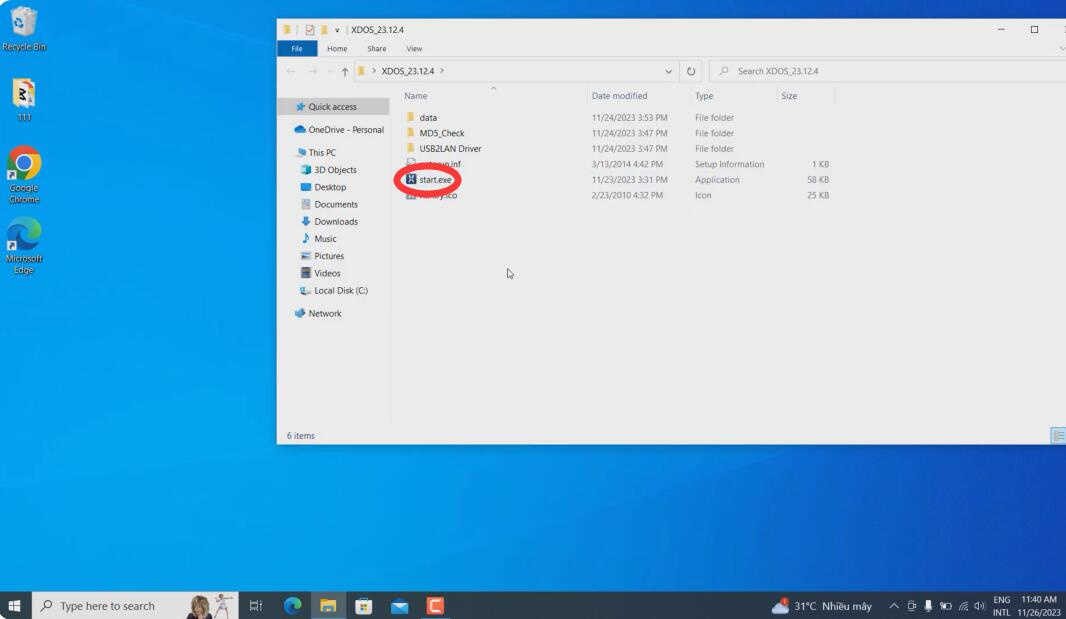
Step 1: Initiating the Installation
Begin by locating the installation folder, typically named “XDS_[version number]”. Inside, find and double-click the “start” application to launch the installation process.
Step 2: Language and Prerequisites
You will be prompted to select your preferred language for the installation. Choose the language you are most comfortable with from the provided options.
Next, Xentry Diagnostic OpenShell will identify necessary prerequisite components that need to be installed on your computer. Click “Install” to proceed with the installation of these requirements.
Step 3: Navigating the InstallShield Wizard
The InstallShield Wizard will guide you through the main Xentry software installation. Click “Next” to continue.
Accept the terms and conditions in the license agreement and then click “Next”.
It is recommended to install Xentry in the default directory. Simply click “Next” to accept the default installation location.
Continue by clicking “Next” again to proceed with the installation.
The installation process will now begin. Wait for the InstallShield Wizard to install XENTRY Diagnostic OpenShell. This process may take a considerable amount of time, potentially exceeding two hours, depending on your computer’s performance.
Once the installation is complete, you will be prompted to restart your PC. Follow the on-screen instructions to restart.
After your computer restarts, ConfigAssist may launch automatically. Close ConfigAssist as further configuration steps are required.
Step 4: ConnectorAPI and Registry Configuration
Navigate to the “ConnectorAPI” folder within the installation files. Copy “ConnectorAPI64.dll” to C:WindowsSystem32.
Next, double-click “64.reg” and click “OK” to add the necessary entries to your system registry.
Then, open the “SysWOW64” folder. Copy “XentryAPI.dll” and paste it into C:WindowsSysWOW64.
Similarly, double-click “old key loader for configassist or startkeycenter 64bit.reg” and click “OK” to merge it into the registry.
Step 5: Executing Blacklist and Copying Files
Run “XDOS black list.exe” and click “Extract”. This step is important for proper software functionality.
Copy the folders from the “Baureihen” folder to C:Program Files (x86)Mercedes-BenzXentryKontexteProduktuebersichtBilderBaureihen. This step ensures vehicle model images are correctly displayed within Xentry.
Step 6: Configuring Xentry Folders
Go to C:ProgramDataMercedes-Benzconfig and create a new folder named “Xentry”.
Then, navigate to C:ProgramDataMercedes-BenzconfigXD_MB. Copy “GlobalUserSettings.properties” to C:ProgramDataMercedes-BenzconfigXentry.
Step 7: Activation and Smart Key
Now, you need to activate Xentry. Run ConfigAssist. Copy your Hardware ID and send it to the provided email address ([email protected]) for activation. This is usually a paid service to obtain your Smart Key code. Alternatively, you may use a Xentry Key Generator if you have one.
Click “Manual”, input the received StartKey code, and click “Save”. A confirmation message will indicate successful StartKey installation.
Step 8: Finalizing and Running Xentry
For versions prior to 12.2023, navigate to C:Program Files (x86)Mercedes-BenzXentryXD_MBbin. Cut “XentryServices.xml” to your desktop, open it with Notepad, locate and delete the specified line (refer to original instructions if needed), save, and then move it back to the original location. Repeat this process for C:Program Files (x86)Mercedes-BenzXentryXD_DTbin. For version 12.2023 and later, this step can be ignored.
Copy “Backup.bat” to C: and double-click to run it. This generates the “lic_key_2.dat” file – do not delete this file.
Copy “start_Xentry.bat” to C:Program Files (x86)Mercedes-BenzXentryXD_MB. Right-click “start_Xentry.bat”, send to desktop, and create a shortcut. Always use this shortcut to start Xentry instead of the default executable.
Installation and activation are now complete. To exit Xentry, use the “Diagnosis Stop” icon on your desktop.
Troubleshooting Common Issues
SmartKey Invalid Error: If you encounter a “SmartKey invalid” error, double-check that you have correctly disabled the “Secure boot” option in your BIOS settings as mentioned in the prerequisites. This is the most common cause for this issue.
By following these detailed steps, you should successfully install and activate your Xentry diagnostic software. Ensure you follow each step carefully for a seamless installation process and to begin utilizing the powerful diagnostic capabilities of Xentry for Mercedes-Benz vehicles.