Keeping your Mercedes-Benz diagnostic tools up-to-date is crucial for optimal performance and access to the latest features. If you’re using the Xentry Connect C5 Doip multiplexer, this guide will walk you through the software update process. This powerful tool, essential for comprehensive Mercedes-Benz diagnostics, benefits significantly from regular software updates. This article provides a detailed, step-by-step approach to ensure your Xentry Connect C5 DoIP is running smoothly and efficiently.
Note Before You Begin:
- This update guide is specifically for the DoIP Xentry Connect C5 and is not applicable to SD Connect C5 (SD C4 in a C5 case). Ensure you have the correct device before proceeding.
- If you are experiencing issues with older XDOS versions (2018.3 or 2017.9), updating to version 2018.7 is recommended.
- If your XDOS 2018.5 is functioning correctly, an update to 2018.7 might not be necessary but is still advisable for accessing the newest functionalities and patches.
- For users who prefer professional assistance, consider sending your DoIP C5 HDD and Dell HDD to specialized service providers for a hassle-free upgrade.
Preparing for Your Xentry Connect C5 DoIP Software Update
Before initiating the update for your Xentry Connect C5 DoIP, gather the necessary tools and ensure you have everything ready. This preparation is key to a smooth and successful update process.
Required Tools:
- Xentry_Kit_09_2017.iso: This software image is essential for the update. Copy it to your IODD 2541 _ISO folder.
- USB Drive with Windows PE: A USB drive with a bootable Windows environment (like Bigbaicai WinCE) is needed for certain steps of the process.
- IODD 2541 External Encrypted Hard Drive (or similar): This external drive will be used to facilitate the software update on your Xentry Connect C5 DoIP.
- Panasonic Power Adapter: Ensure a stable power supply to your Xentry Connect C5 multiplexer during the update to prevent interruptions.
- Xentry Connect C5 DoIP Multiplexer: Of course, you’ll need your Xentry Connect C5 device for the update.
Step-by-Step Guide to Updating Your Xentry Connect C5 DoIP Software
Follow these steps carefully to update your Xentry Connect C5 DoIP software.
Part 1: Accessing Update Mode on Xentry Connect C5 DoIP
- Standby Mode: Ensure your Xentry Connect C5 mux is in standby mode.
- Power Connection: Connect the Panasonic power adapter to your Xentry Connect C5.
- IODD 2541 Insertion: Plug the IODD 2541 into the USB port on the C5 DoIP.
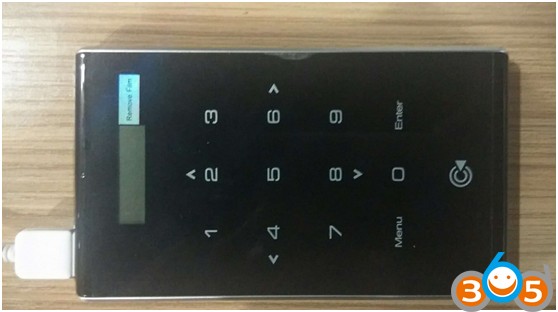
- Initiate Update Prompt: Simultaneously press the “X” and “√” buttons on your Xentry Connect C5 DoIP. This should prompt “Start Update?”. If you see “Start XENTRY Connect?” instead, wait for the prompt to disappear, and “Start Update?” should then appear.
- Enter Update Mode: Once “Start Update?” is displayed, press the “√” button. Your Connect C5 will now enter update mode, and the IODD 2541 should light up, indicating activity.
Part 2: Commencing the Software Update
- IODD 2541 Button Press: Immediately press button “5” on the IODD 2541. The cross “X” on the Xentry Connect C5 DoIP screen should change to a circle “O”.
- Update Progress: Observe the Xentry Connect C5 DoIP screen for update progress indicators. You will see a series of screens displaying the update status.
- Completion Time: The update process typically takes between 50 to 55 minutes. Allow ample time and avoid interrupting the process.
- System Restart: Once the installation is complete, the system will automatically restart.
- Troubleshooting Startup: If your system fails to start after the update, power off the C5 mux and restart it again.
Part 3: Post-Update Configuration on Dell Laptop
- HDD Removal: After the Xentry Connect C5 DoIP restarts, carefully remove the hard disk from the C5 mux.
- Laptop Installation: Install the removed hard disk into your laptop (e.g., Dell 55220). Ensure you have already installed the Windows PE system on your USB drive.
- Boot Options: Start your laptop and press F12 when you see the “F12 Boot Options” prompt.
- Select USB Storage: Choose “USB Storage Device” from the boot options menu and press “Enter”.
- Choose WIN2003 PE: From the interface that appears, select “[03] WIN2003 PE Classical”.
- Create User Account: Once in the PE system, create a new user account.
- Windows Drive Location: Ensure that Windows is located on disk D:.
-
Admin Account Creation: Right-click and select “Create a new admin account” on the left side.
-
User Credentials: Set the Username to “C5” and Password to “abc12345678”. You can choose different credentials if preferred.
- Account Confirmation: Click “Ok” to create the account.
- Close Application & Power Off: Close the user account application and then turn off the laptop.
- HDD Re-installation: Remove the hard disk from the laptop and reinstall it back into the Xentry Connect C5 multiplexer.
Your Xentry Connect C5 DoIP software update is now complete!
Activating Your Xentry Connect C5 DoIP After the Update
Following the software update, activation is required. Refer to this TeamViewer guide for a step-by-step activation procedure:
Files Needed for Activation:
Installing EPC WIS Software on Your Xentry Connect C5 DoIP System
For instructions on installing EPC WIS software, watch these video guides:
Connecting Your Xentry Connect C5 DoIP with Xentry Tab/Laptop
This section demonstrates how to connect your Xentry C5 SD connect with a Xentry tablet, and the process is similar for connecting with a Dell D630 or Lenovo laptop.
- Standby Status: Ensure your C5 DoIP is in standby status when not connected to a vehicle.
- Connectors: Locate the 2 USB connectors and the round power connector on the left side of your C5 DoIP.
- LAN and Power Connection: Connect the LAN cable and the power cable to your C5 DoIP.
- Power On Tablet: Press the power button for 3 seconds to turn on your Xentry Tab.
- OBD and LAN Cable Connection: Connect the Xentry C5 OBD cable and LAN cable.
- No Vehicle Connection: The display will indicate “No car connected” as it is not yet connected to a vehicle.
- Xentry Tab Main Menu: Navigate to the Xentry Tab main menu.
- Open Xentry Control: Launch Xentry Control.
- Communication Interface: Wait for the communication interface to appear.
- Xentry Connection: Xentry is now connected with SD C5.
- Green Icon Click: Click on the green icon to proceed.
- Launch Xentry Software: Launch the Xentry software.
You can now run the MB Star diagnostic software and begin diagnosing your Mercedes-Benz with your updated Xentry Connect C5 DoIP system.